Friday, December 30, 2011

{Crafty Year in Review} Part 2

It's time for Part 2 of our Year in Review. See yesterday's post for projects #10-#6!

We're counting down the crafty posts most viewed by YOU this year at Grits & Giggles. Let's get back to business at number 5!

#5
Oh, how I love this little shirt. Like most kids holiday shirts, Gray only got to wear it a couple of times before Christmas, but it was cute when she did! I hate the idea of paying lots of money (I'm pretty cheap) on a shirt or dress that she can wear once...so I used some scrap fabric and a plain white tee to make her this little number.

#4

This is another one of my absolute favorites...my Seersucker Anthropologie Knock-Off. This is The. Most. Comfortable. dress on the planet. The sheering in the back with the ties on top make it super easy to wear and the seersucker means it is weightless. I made another one for the tutorial, but this is still my favorite.

#3

I was on a real dress kick this summer. I made this dress as part of a sew-along at KojoDesigns. I wore it to several events this year including a football game and a wedding rehearsal...talk about multi-functional! AND...it's super comfortable too.

#2

What can I say...I love this wreath. The bows, tulle, ornaments...it all makes me happy and it really dressed up our door during October!

And the Number One, most viewed project this year was......
(Drumroll Please.....)

#1


The Scrapbook Coasters Tutorial!!!!
This post alone received more than TWICE the number of hits of any other post on the entire blog. That's HUGE for one little project!

I think I have pinterest to thank for this one. SOOOOO many of you and others have pinned this to your DIY boards.

Thank you, Thank you, Thank you for visiting with me each day, reading, commenting and most of all, crafting!

I'll see you Next Year


Thursday, December 29, 2011

{Crafty Year in Review} Part 1

This has been such a WONDERFUL year! There has been so much crafting, sewing, cooking, glitter, fabric, hot glue, and ribbon that I've barely been able to keep up with it all. Luckally for me...YOU have been helping me keep up!

I started this little blog back in April, wanting to keep an online diary of life with a husband, little girl and a few crafts along the way. Little did I know that I would have ALL of you amazing readers coming every day to join me in my Mommy and Crafting journey.

Today and tomorrow I will be doing a little countdown of the 10 most popular posts at Grits & Giggles this year. Most of these are tutorials that YOU, the readers have given me great feedback on, and even shared the things you've made using them with me! I love to see what you do, so send me a link so I can share what you've been doing too.

Let's get started!!
#10
This was one of my favorite projects this year because it incorporated three things I adore...dots, argyle, and monograms! Fall is my favorite season, so I got to enjoys these sweet pumpkins for several months on my front porch.

#9

Gooooo Tigers! I made this blanket at Hubby's request, because he needed a Clemson blanket that was "Man-sized"...meaning...long enough to cover him from head to toe. As much as I love sewing, I love making these kinds of blankets because they can be made anywhere and are quick to finish with beautiful results!

#8

This skirt was made for the "Summer of NO Pants" series at Hideous, Dreadful, Stinky. I challenged myself to make 4 skirts, and it looks like ya'll loved this as much as I did! Thsi was one of my first tutorials too. I've learned a lot since then, but it's still easy to follow I think.

#7

I love this necklace...but I've never worn it. I made it to go with a certain dress to an event this summer...then I changed my mind on the dress. I'm sure I'll come up with something. Until then, it just sits looking pretty on my jewelry box.

#6

This shirt-to-dress refashion was inspired by the tutorial at MADE. I saw this shirt at Goodwill and knew it would make an adorable little dress.

Come back tomorrow for project #5 down to the #1 most-viewed Grits & Giggles project of the year!!

Party Time

I Love, Love, Love visiting and contributing to Linky Parties each and every week. It's a great way to see what others have been making, get SERIOUSLY inspired, and show of YOUR work for others to see! I have a few that I visit each and every week, but I love stumbling upon new ones.

I've always had a few under my Favorite Links tab, but they aren't well organized. Here is my new compiled list of craft link parties that I visit and participate in.

If you have one and I have left it out...let me know! I will add it to the list so I can visit, and my readers can find it as well.

Monday


Tuesday


Wednesday


Thursday


Friday


Saturday/Sunday


Enjoy visiting these sites for their weekly parties and dial up your creativity! If you're on Pinterest....these are just as addicting. Think of all of the pinning you could do!!!

Monday, December 26, 2011

A New Quilt

The quilting bug has bitten again..... and I've finished my second quilt!
Some of you may remember my First Quilt that I made for Grayson for her birthday.

This new quilt too, is special. It was made for a college sister of mine, for her new baby. She will be having a little girl in just a few weeks! Her nursery will be blues, greens, and yellows (very much like Grayson's) so I wanted her to have something warm and soft to match her nursery.


The fabric for this quilt was from a jelly roll that I fell in love with at Hobby Lobby. I'm a sucker for blues and greens, so I bought it with no project in mind, and then HAD to use it for this quilt. I love how it turned out!

I threw in some white strips to lighten it up a bit.


The patterns have a few flowers and butterflies, but it doesn't scream GIRL. She will share a room with her brother (Grayson's age) for a while, so it won't be too girly for him too.


The backing is a solid teal cotton, and the binding is the same. I didn't want anything to compete with the pretty patterns on the top.


I'm not a quilting purist, so I machine quilted everything. The construction was simple, just sewing the jelly roll strips together for a clean line look. I straight-line quilted it, one line on either side of each seam.


This quilt would look PERFECT in Gray's room, but I am thrilled that it will be living with my friend and her new bundle of joy. I hope it keeps her toasty warm for a long time!


I have a plan for some mini-quilts coming up, but more on that later. It is going to be a very special project for me.


Saturday, December 24, 2011

Christmas Time....

It's beginning to look a lot like CHRISTMAS....
Everywhere you go.....

Especially at my house. Having a 16 month old has made decorating sooo much more interesting. The tree is only decorated from 3 feet up...the Nativity scene needs a security fence...you get the picture.

Gray has been spending time under the tree reading her favorite book.

Oh if she was always that precious....


The tree is decked out with ribbons, bows and funky ornaments.


Note to self...the tree needs more stuff! I love a good, full tree.


The mantle is decorated with stockings, candles, and lights.


A chubby snowman welcomes us at the front door....


Some gifts are wrapped up and under the tree....


Waiting for curious little hands to rip them open on Christmas Morning!


This is one of my favorite times of the year. Family, food, and good times make for the best holidays, and we certainly aren't lacking in ANY of those around our house!

Thursday, December 22, 2011

Remembering

It's hard to believe that this time last year...my little girl was only 4 months old. Still a squishy infant with nothing to say and nothing to do, except be cuddled and loved on. While she's still cuddled and loved on MOST of the day...now she has an agenda! She's learning new words and discovering new things as she runs around the house.

I was looking through last years Christmas pictures and couldn't believe how much difference a year makes.
 Here is a little trip down memory lane...

Christmas 2010

Now she's 16 months and such a BIG girl! She's turning into her own little person more and more every day.

Christmas 2011

I'm looking forward to taking LOTS of pictures this weekend of Gray and our family. Unfortunately I have to work on Christmas Night (Hospitals don't tend to observe holidays...people still get sick), so I'm going to soak up as much as I can while I'm at home!

Wednesday, December 21, 2011

What I Love Wednesday- Flattery Addition

What I Love banner


For this edition of What I Love Wednesday, I want to show of some of the crafty things that YOU have been doing that have been inspired in some way by something you saw at Grits & Giggles.

It is soooo flattering to see a craft that someone else made using YOUR tutorials Linked Up to parties for others to see. That's why we blog and share ideas....to help out each other's creative itch and make our homes and lives a little more crafty and beautiful!

Here are three projects that three very talented ladies put together, as well as the Grits & Giggles version. I found these through friend's blogs and through link parties....

I was blown away by the cuteness of this wreath made for....a GUY! (Doesn't that "S" look like stitched leather???) I was thrilled to see that she had used our Funky Christmas Wreath tutorial. See Kimberly's post over at Simply Living.


My BFF and "Lil Sis" from college, Morgan, who blogs over at Monogram Addict,  made this adorable Halloween wreath. I love her "Trick or Treat" sign! Why didn't I think of Candy Corn? Such a cute touch.


 My college friend Kristen made a beautiful SC map out of scrapbook paper over at B.A. In Housewifery

 
The scrapbook map was Inspired by The I {Heart} South Carolina Patchwork


Thanks for Reading, and Sharing your craftiness with others!


Here's your featured button Crafty Friends!

 
Featured Button 


Tuesday, December 20, 2011

*Updates*

I have been Busy, Busy, Busy updating things around the good 'ol blog. I have added TONS of DIY's to the TUTORIALS page. I didn't realize how behind I had gotten! You can now find all of the Christmas tutorials there, including the

And
Funky Christmas Wreath, as well as many others.


I'm also busy in my sewing room (Or disaster room, as Hubby calls it) working on some new things for the SHOP. Once the New Year rolls around all too soon, I'll be adding some colorful and fun new items.

Sunday, December 18, 2011

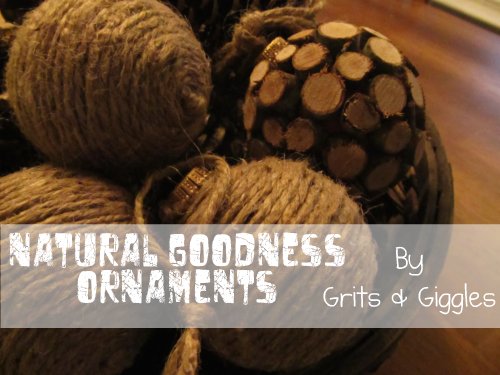
Natural Goodness Ornaments {Tutorial}

Here is my original post over at The Crafty Nest for Vanessa's 12 Days of Christmas. There were some seriously cute decor/gift ideas so if you missed it, go check it out!


Christmas Banner copy


Natural Goodness

Hey Ya'll! I'm Jenilyn and write all about my adventures in Mommyhood and crafting over at Grits & Giggles. I'm a southern girl who loves to cook, craft, and love on my Husband and 16 month old baby girl.


I love to collect ornaments. I have TONS of ornaments at home from special occassions, vacations, or unique finds at shops. We have a very ecclectic Christmas. Each ornaments has a story or an inspiration.

On a recent trip to Tennessee, I saw some adorable "natural" Christmas ornaments in a mountain shop, and I knew I had to have them on my tree this year. I want to share with you how to make your own "Natural Goodness" ornaments for your tree, or for your home! Throw them in a basket for a fun earthy decoration year-round. Materials


Plain Christmas Ornaments
Jute
3-4 sticks (1/2"-1" in diameter)
Saw or Drimmel Tool
Hot glue


Directions

Step 1: Begin with the Jute ornament. Take the end of your jute and tie a knot (leave it on the spool, don't cut it!)


Step 2: Place some hot glue on the bottom center of your ornament and glue the knot down


Step 3: Begin wrapping your jute around the ornament, gluing a little as you go


Step 4: Continue wrapping, pressing each round of jute into the previous one to get good coverage on the ornament.


Step 5: When you get to the top of the ornament, cut off the and of your jute, tie a knot and glue it down.

 To make the "Woodsy" ornament, begin by carefully cutting your sticks. Cut discs 1/4" to 1/2" thick using a saw or drimmel tool.You will need around 50 disks to cover your ornament. Don't worry if they're a little misshapen, or have rough edges, that's what makes them beautiful!


 Begin gluing your disks around your ornament. Try to fill in gaps and holes with smaller or broken pieces.


Step 9: Continue gluing until your ornament is covered with woodsy goodness.


Tie a ribbon or jute tie on the top of each ornament, hang and enjoy!


Or place them in a basket and enjoy year round. Just remove the "ornament hanger" and cover with wood or jute.


Pin It

Brought to you by:


GritsAndGiggles
Related Posts Plugin for WordPress, Blogger...