Thursday, August 28, 2014

Ruffled Camera Strap Cover {Tutorial}

I made myself a ruffled camera strap a couple of years ago, but never took a picture of it because...well...it's on my camera. I love it. When my sis-in-law got a brand new camera for her birthday, she wanted a girly and fun camera strap too! 


Here's how I put hers together. 
*each camera strap is different. I don't include measurements. This is just a general guide to making a ruffled camera strap.


Materials:
Outer strap fabric (will show the ruffle)
Bottom fabric (will be against your neck)
batting or padding material (mine is pink fleece)
ribbon
sewing things


Cut a strip of your top fabric twice as long as the camera strap (measuring only the middle, leather or vinyl part)
Make your strip about 3" wider than your camera strap width. You will trim extra width later.

Set your sewing machine to its longest stitch length, and sew a line down the middle of the length of your top strap piece. 


Grab the bobbin thread (the one on bottom) and gently pull, ruffling your fabric. 


Continue ruffling until your fabric is 1" longer than the camera strap section you will be covering.


Iron your ruffles down to make them nice and flat.


Cut your batting and bottom fabric the length of your camera strap + 1". It will be the same length as your ruffle fabric piece now.


Lay the batting and bottom fabric right sides together, and sew a few stitches to hold them together. You can sew them long ways, width ways, or get fancy and do some swirls. Just as long as the two pieces are now one.


Cut a piece of ribbon a couple of inches longer than your ruffle piece. Sew down both sides of the ribbon, covering your gathering stitch, down the middle of the ruffle piece.


Lay your bottom piece on the ruffled piece, right sides together.


Sew down ONE long side of the strap cover. Use pinking shears to trim off extra fabric from the seam allowance.


Open your strap cover up, and it's time to finish the edges. Fold the end in 1/4" towards the wrong side, then fold again 1/4". Pin and sew across, hiding the raw edges. Do this for both ends.


Now, fold your strap cover right sides together, and sew the other long side closed. Use pinking shears to trim extra seam allowance. Make sure first that you have a wide enough opening for your strap to go through!


Now the fun part. Using a turning tool, a knitting needle, chopstick, etc., turn the strap right side out. This can take patience. 


Once it's turned, it's time to insert your camera strap! Use a tool, ribbon, or other method to feed your strap through. This can also take patience. 


Now throw it back on your camera and take some pictures! 


*I will say, while these strap covers are adorable and comfy, it does make the camera harder to fit into more compact cases and bags. It's never really bothered me, but it's something to think about if you carry your camera around a lot!
Shutterfly Baby Pictures 300x250

Tuesday, August 26, 2014

Prepping for Football

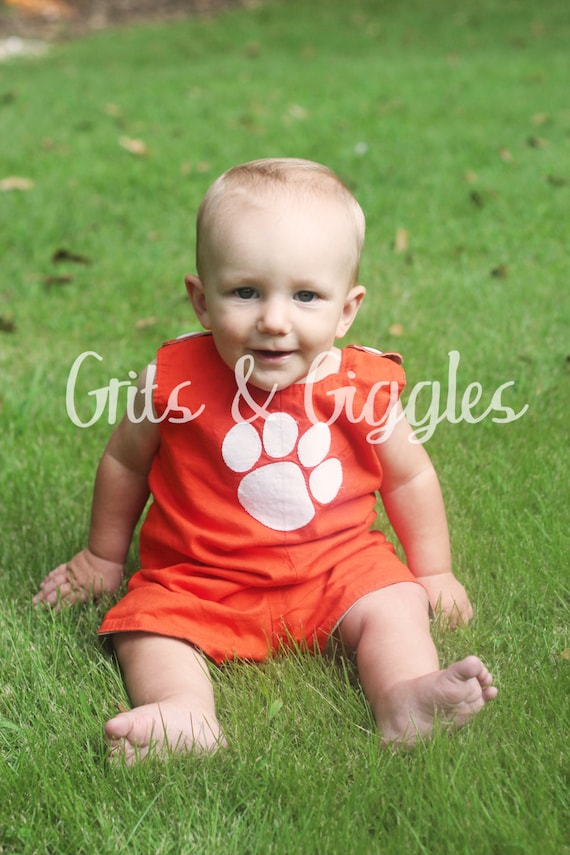
Around here, football is a big deal. College football that is. We pull for our Clemson Tigers from August until December...and get sad and anxious when that last game of the season is played. I love football, but most of all, I love the family time we share because of football. Our family doesn't lack for time together, but tailgating on Saurdays just adds a few more hours to valuable time spent with parents, grandparents, and babies. 

As football season rolls around, we have to make sure we have all of the accessories we need: for tailgating, home, and ourselves. 

Here are a few items that make football season a little more festive, and some have tutorials too!!

As the colder months set in, it's nice to have a snuggly warm blanket to cuddle underneath. This No-sew version is so easy, and perfect for kids to help too!


Stadium Throw Tutorial

We LOVE our giant orange and purple wreath. These are easier to make than you may think too! Check out the tutorial!


Our new garden flag is a sweet colorful reminder of our favorite team.


Personalized coozies make keeping up with drinks easy! You can buy blank coozies online and monogram them yourself, or find a great Etsy shop to do it for you.


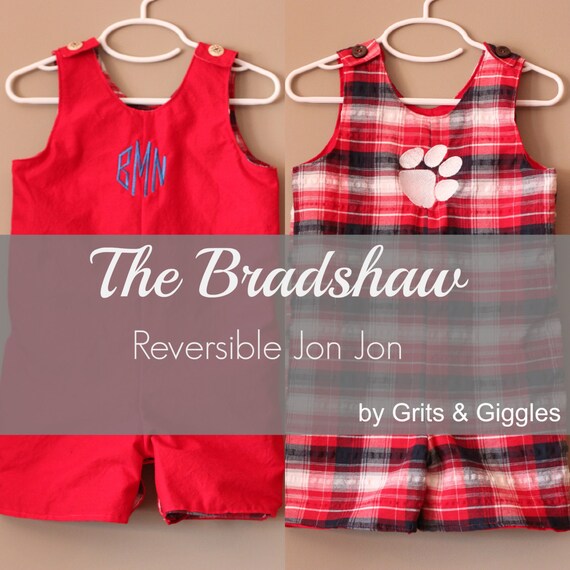
Use the Bradshaw Reversible Jon Jon Pattern to make game-day ready apparel for your little boy. The jon jon is lightweight, comfortable, and has snaps for easy diaper changes!


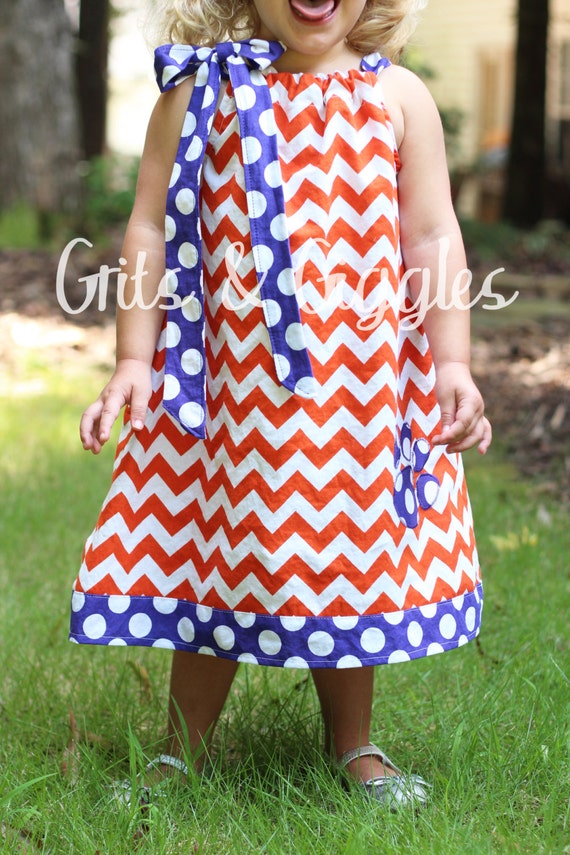
Use the Zoey Bow Dress pattern to make ANY combination of school spirit dresses! Little girls love these dresses, and they are such a quick and easy sew!


Cornhole Boards complete the tailgating package with something fun to play! Hubby made these a couple of years ago and we still love to get them out!


I hope some of these projects can help you prep for a fun and festive college football season...no matter who you pull for!

Go Tigers!


Tuesday, August 19, 2014

Pattern Sale

I'll call it a "sale", but the truth is....ALL Grits & Giggles patterns are just 

$5.00 in our shop on Craftsy !!

Craftsy makes buying patterns simple and convenient. You can "wishlist" patterns you would love to try. Or purchase the patterns right away and download them instantly. The patterns are always available in your account, in case of a computer crash, so you'll never loose your precious stash of PDF patterns!

Choose from patterns for boys, girls, babies, tweens, and accessories. There's something for everyone.


And of course, all Grits & Giggles patterns are "Easy to Sew" and full of photos and instructions. For $5.00 there's no reason NOT to try sewing something special!


Thursday, August 14, 2014

Glitter Crowns {Tutorial}

When Goldilocks told me she wanted a "princess" theme for her party this year, I was excited to create something to make it special. I was going to make her a crown to wear, but then decided that the other kids would probably like one too!

One trip to Hobby Lobby, and I had my materials to make 10 sparkly, glittery crowns, fit for princes and princesses.

Materials:

Fabric-backed glitter "paper" (in the felt section)
3/4" wide elastic
sewing things


I chose pink for the princess, and neutral gold and silver for the rest of the crowns, since there will be boys there too! Each piece of paper makes 2 crowns, so one other girl will have pink to match the birthday girl.


Flip over your paper, and simply draw an even zig zag pattern down the middle. Draw it long ways.


Use scissors (not your fabric scissors!!) to cut out your crowns. Cutting through the glitter isn't too messy, but it's hard on scissors.


For toddler heads, I cut my elastic to 6". The 6" elastic, plus the 11" length of paper should fit around their head nicely. They had enough stretch to not be too tight, but still stay on.

Sew the elastic with a few zig-zag stitches to the back of the paper.


Now you have adorable crowns, ready for a royal party!


They're lightweight, and comfortable to wear. Not to mention your royal subjects will LOVE wearing them to feel special at the party!


Monday, August 11, 2014

Youth Trip: Waterfalling

Last weekend, Hubby and I, along with our cousin and his wife, took our church youth/Sunday school class on a little hiking trip. Our intent was to have a lesson and lunch before we left on the trail, then to walk and see some pretty waterfalls. We went to Brasstown Falls in South Carolina.

 It was pretty chilly and kind of rainy that day, so we didn't expect to get in the water.

But the waterfalls were calling our names!!


The youth had a blast, but if it's possible, I think we had MORE fun.


There's me on the left in my red jacket. It was too cold to take it off! 


The beauty of living in the upstate of South Carolina is that you are just a short drive from the mountains, and from some beautiful places. 


After splashing in the smaller falls, we found the GOOD one.  I only had my cell phone to take pictures (since it was raining), so I don't have great pictures of the big falls. Let's just say we experienced first hand how loud, powerful, and WET a waterfall can be. 


The girls all rode in one car, and I must say I learned a lot by talking and listening to them. They are all high school girls and informed us of the following:

  • People over 25 are "old"
  • Songs that came out over a year ago are "old"
  • Without the "dictionary" app on their phone, there is no other way to find out what a word means
  • 70's and 80's music is cool again (but still old)
  • Having no cell phone signal is painful and scary

All joking aside, these are smart, talented girls (and boys) and they have SO much ahead of them in life. We were so happy to get to experience a little bit of fun with them, and learn from them this weekend. 


Friday, August 8, 2014

HUGE Craftsy Class Sale

Save up to 50% this weekend on classes at Craftsy! Offer ends August 11, 2014.

Have you tried Craftsy classes yet? 

They are taught by expert instructors, and you can pause, rewind, and replay as many times as you need while learning a new skill!

They make great gifts too for the person you know who has EVERYTHING already. Give them the gift of a new hobby! Or enhance their hobby with advanced skills.


*This post contains affiliate links


Related Posts Plugin for WordPress, Blogger...