Thursday, January 29, 2015

Free Font February: Coming Soon

Ya'll know I LOVE fonts. They have taken over my computer.

I use them for everything. From blogging, to cards, to printables, to making DIY everything in my house. There's something about a pretty font that can take a project from good...to GREAT!

This February, I'll be sharing my favorite FREE fonts with you, all neatly organized in collections.


Stay tuned.....


Monday, January 19, 2015

Zippered Snack Bag {Tutorial}

Even though my babies are still a little young for school, I have already started thinking about back to school plans. I know it will be a busy time of year, so I decided to knock out a project EARLY this year, so it would be done, done, done, and out of my mind.

While doing my scrapbusting last year, I decided to use some zippers and fabric I already had on hand to make reusable snack bags, perfect for back to school lunches.


These are medium sized bags, about 7x7, so they'll fit snacks, or even half a sandwich.

You'll need:

A zipper 
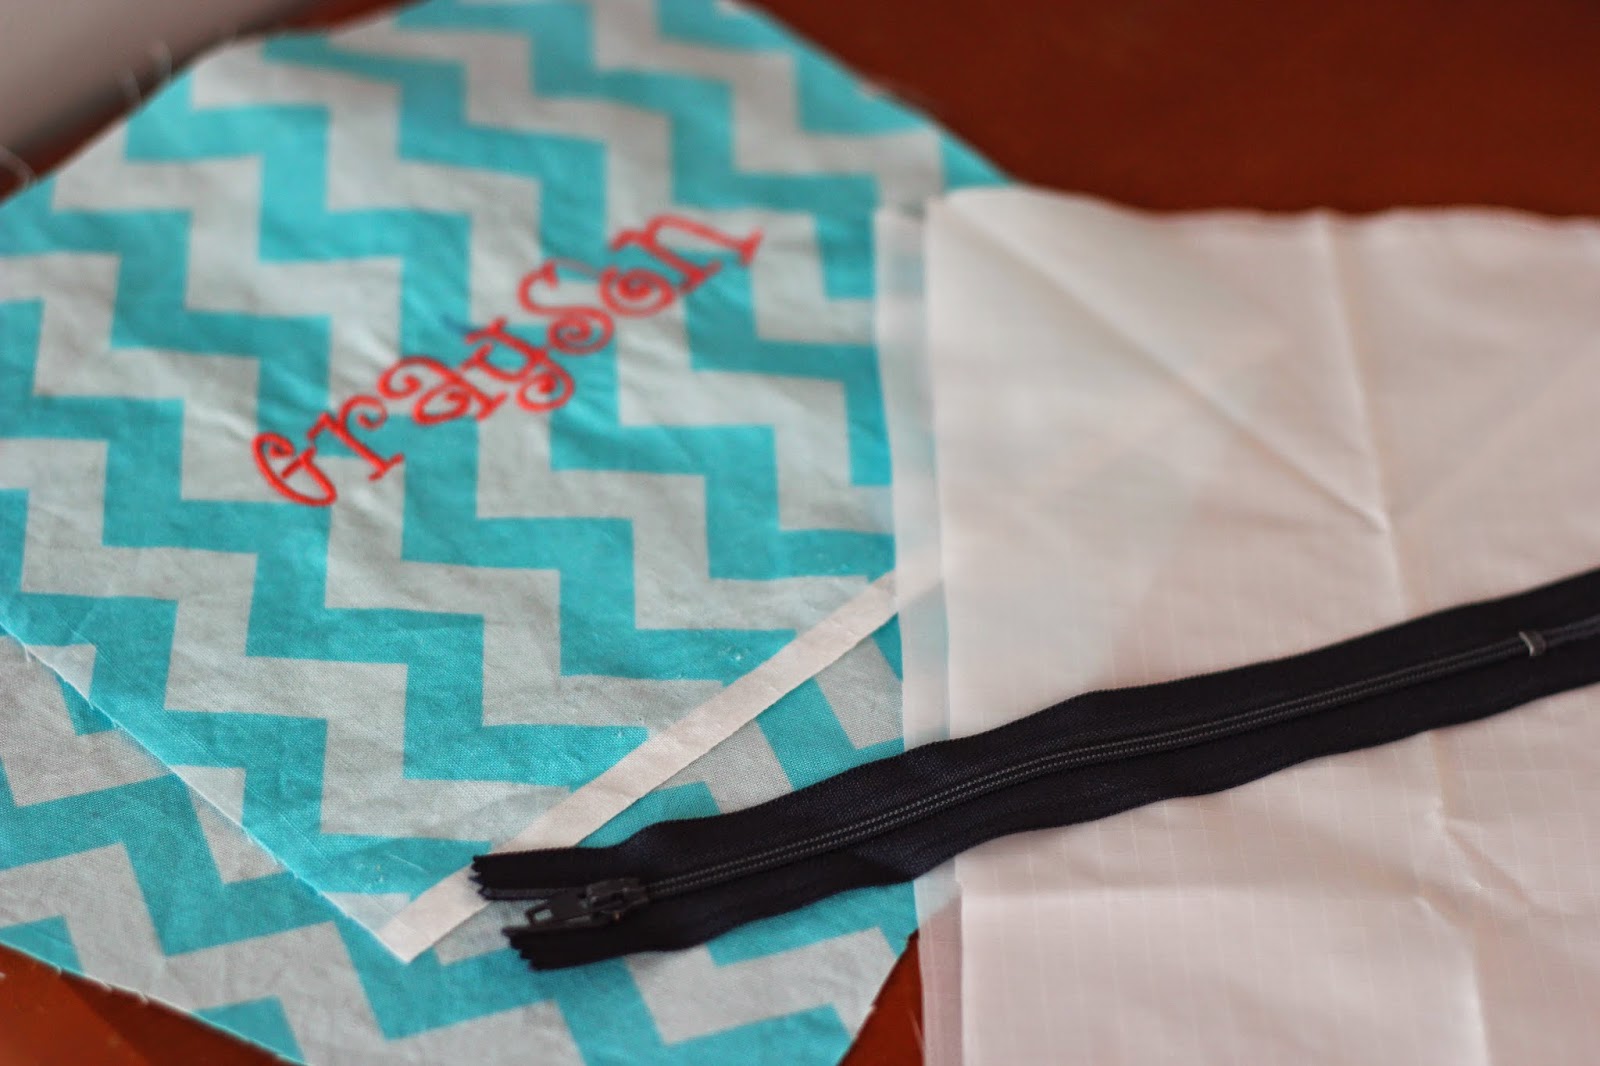
two squares of outer fabric (the width of the whole zipper tape)
two squares of lining fabric
sewing things

*I used rip-stop nylon for my lining so food wouldn't stick to it, but it would still be totally washable.


First, make a zipper sandwich. Place your lining, right side up on the table, then your zipper right side up, then your outer fabric right side down. 

Sew the three layers together, close to the zipper teeth.


When you flip the pieces over, you should have plenty of room to unzip your zipper. Make a zipper sandwich on the opposite side of the zipper, just as you did before. This will give you both sides of your bag.


Once your fabric is attached to your zipper, spread the fabrics out away from the zipper and topstitch along the edge. This will keep the fabric neat, and out of the zipper's way. 


Now, unzip your zipper halfway. DON'T forget this or you'll be angry later.

Now, flip your fabrics so that your outer layer is right sides together, and your lining is right sides together. 

Sew around the entire rectangle, leaving a small hole in the lining for turning later.


Once you've sewn your rectangle, pull the fabric through your open zipper (see, leaving it unzipped was important!). Before stuffing the lining back in, sew the hole shut that you left for turning.


Simple, quick, and best of all, cute and reusable! The kids can get these open themselves without the irritating sound of velcro! And if they get dirty, just throw them in the washing machine.


Now, I'll put them away and hope it's a long long time before I need them!!


Thursday, January 15, 2015

A Scrappy Year

This year I vowed to use up some of my scraps. And boy...did I use some SCRAPS!!! 

I didn't realize how out of control my scrap bins were. That's right....bins. Plural. I had 4 cubes of scraps, from quarter yards to tiny little strips that I swore would  be perfect for a scrap project. 

I have really put those scraps to use, making everything from clothing, to kitchen accessories, quilts, bags and more. 

Here is a look back at this year's scrap-tacular projects:


I've also made LOTS of clothing this year using appliques as embellishment, which has used a lot of my smaller scraps. As the kids get older and start school, I know there will be a lot more appliques in my future. Goldilocks love anything with her "mom-ogram" on it, so I indulge her every chance I can. 

It has been very freeing to use up sooo many scraps this year to make things for my home and for others. I'm hoping to get back to buying some more fabrics so I can have a new stash of pretty things to make stuff with. Now that I've cleaned out so much room in my scrap bins, I now have room for more! 


Monday, January 12, 2015

Fish Stew for Two

Have you ever been to The Chesapeake House in Myrtle Beach, South Carolina? If you have, then you have undoubtedly enjoyed their famous fish stew.

There are recipes for it circulating the internet, but most of those are for a bucket of stew. I don't have that much fish around, nor do I know that many people who are going to come over at once to eat it.

So I experimented with my own version, and sized it down to a perfect portion for two people. Of course, it doubles easily if you DO want to make a large pot. 


Ingredients:

1 lbs fish (cod, flounder, tilapia, mahi, or other flaky fish)
1/4 cup chopped onions
8oz ketchup
1 tsp tabasco
1 tbs worchestershire sauce
salt
pepper
2 cups water

1/2 cup cooked rice (for serving)

Directions:
Sautee your onions in butter or oil until translucent. Add in all other ingredients except salt and pepper. Chop fish into small pieces before adding.  Stir well, and let simmer for at least 30 minutes. Add salt and pepper to taste, and serve over rice.

If you like thicker stew, add your water gradually until you get the thickness you like. If you prefer a more "soup-like" texture, add more water.


I love to mix the rice in mine to make it nice and thick. I also add extra tabasco to make it really spicy! You can add veggies too if you want them. This is just a really great soup base that can make so many types of stew!


Thursday, January 8, 2015

New Year... New Skills


Last year I made a couple of resolutions. I wanted to do two new things that I ordinarily wouldn't have thought of doing. The first was running my first half marathon. LOVED it!!

The second thing I wanted to do was learn a new skill. I took This Class through Craftsy to learn the basics of knitting.

They have soooooo many classes for you to learn new skills, or brush up on old ones and learn new techniques. Best of all, watch them on YOUR time. Hit pause, rewind, and watch what you need over and over again.

This year, make your own resolutions to learn something new that will last you a lifetime!

Here are some great ideas...


Online Sewing Class


Online Quilting Class


Monday, January 5, 2015

Sweater Pillow {Tutorial}

Do you have a pile of sweaters that you love, but just don't wear anymore? Or maybe they have a small hole in an arm, or are getting too fuzzy...

Make them into pillow covers!


This tutorial is super fast, and let's you get a little more mileage out of those soft and beloved sweaters.

Materials:
Pillow or Pillow form
Sweater
Sewing Things


Lay your pillow on your sweater to make sure it will fit. You don't want the sweater to be too stretched over the top or it will get distorted.


Cut off the neck and sleeves. Then sew across the top, and down the sides to close the armholes. (I trimmed mine to a rectangle after taking this photo)


Insert your pillow and slip stitch the bottom closed, or use your sewing machine. If you want it to be more washable, you could even install a zipper or buttons, but I wasn't in the mood for that!


Soft, fuzzy, and beautiful.


Related Posts Plugin for WordPress, Blogger...