
After completing our Bedroom Redo Hubby said there was something missing. He wanted a blanket, or quilt for the foot of our bed. It's been a while since I made us a quilt, so I was happy to oblige. I have seen several herringbone quilts on Pinterest, and wanted to tackle one myself.
I wanted it to be a little more modern than an all-over herringbone pattern, so I went for a large strip of pattern down the middle, with clean white borders. And just for color (and to drive Hubby absolutely crazy), I replaced two sets of gray blocks for navy blue.

I wanted it to be a little more modern than an all-over herringbone pattern, so I went for a large strip of pattern down the middle, with clean white borders. And just for color (and to drive Hubby absolutely crazy), I replaced two sets of gray blocks for navy blue.
While I was at it, I decided to take some photos and share with you how I put it together.
Materials:
1 yard solid color fabric (mine is gray)
3 yards white fabric
3 yards backing fabric
batting
binding
sewing things
You'll need to cut the following 6" squares:
22 white
22 solid color
(if mixing colors, just make sure you have 22 total)
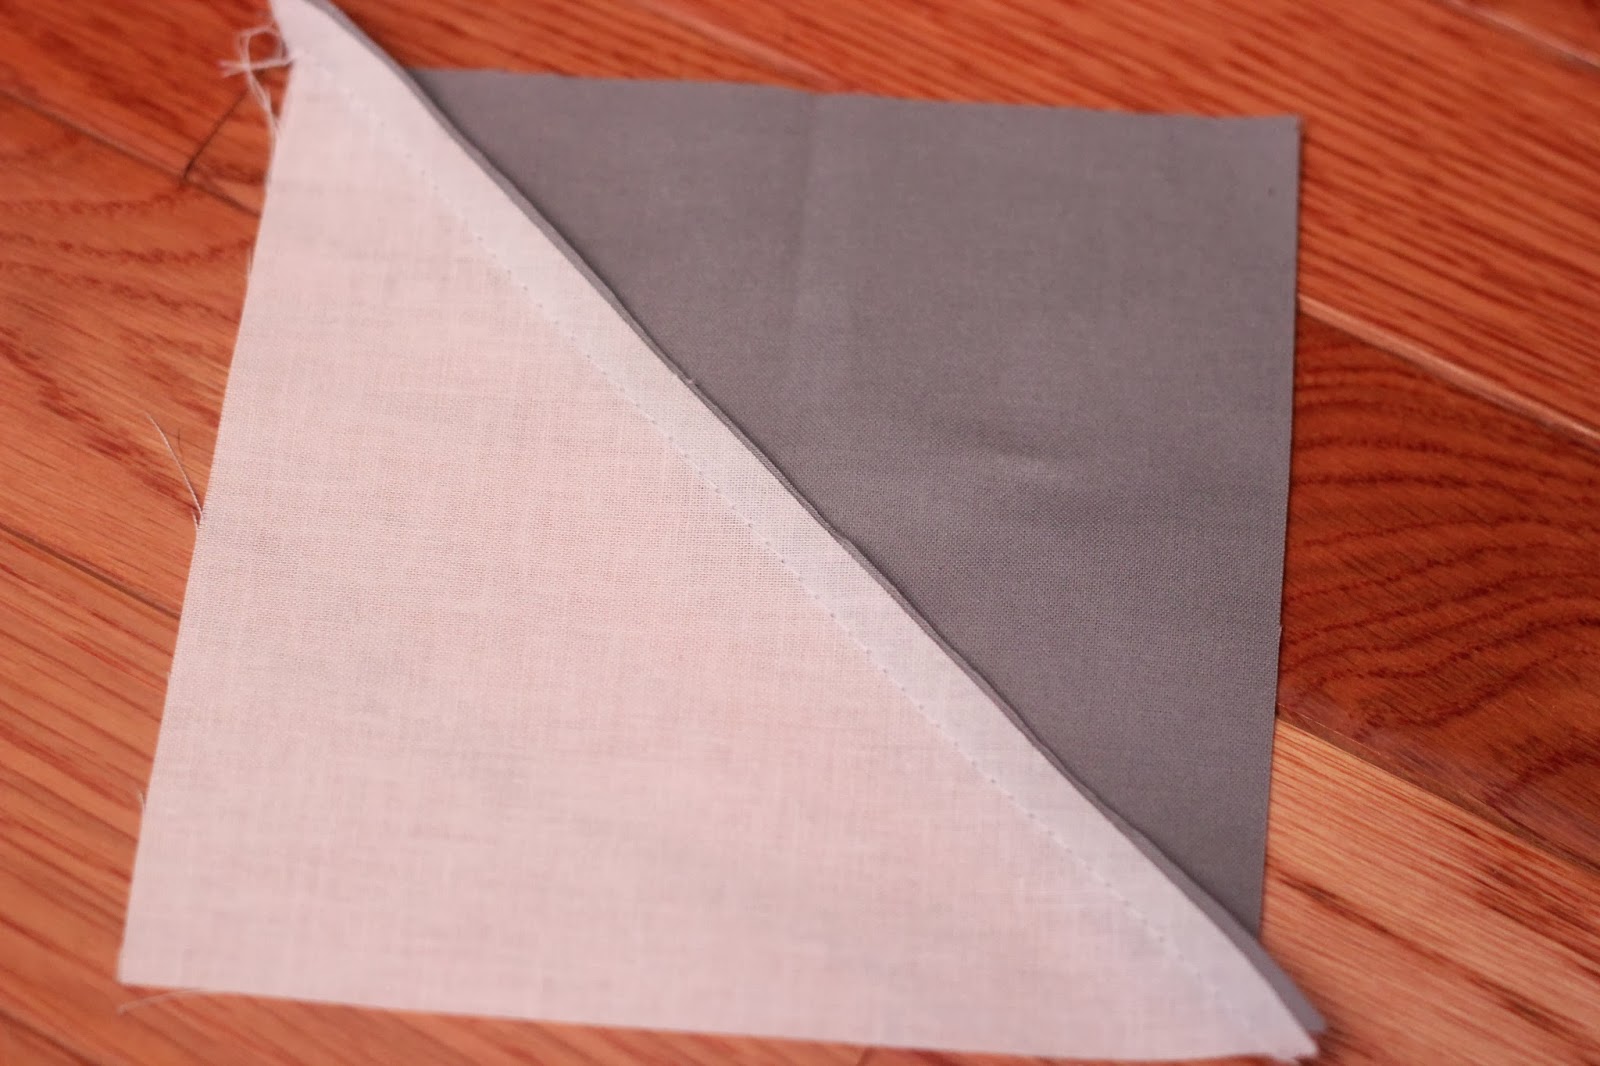
Sew half-square triangles using your favorite method with a white half and a colored half.
This will give you 44 blocks of white/color.

Press all seams towards the colored side of your block. This will help align blocks and lock them into place later.
To make the herringbone pattern, you will need an "up" unit, and a "down" unit, each of two blocks.
This is an "up" unit.


Make your quilt sandwich with your backing fabric on bottom (right side down), then your batting, then your quilt top.

Baste the quilt sandwich using your favorite method, then hit the sewing machine!
You could do any kind of quilting on this piece. I opted for straight lines this time, outlining the vertical seams, then random lines on the white panels.

The quilt has great texture without being too quilted, and the straight lines are super modern.

Just for fun, I added a little strip of blue to my backing. I love it, Hubby thinks it's weird. The story of my life.

Most importantly, it looks great with our bedding, just as it was intended.

It's warm, modern, and beautiful. And with the large side panels, took very little time to put together. It was a great weekend project.
Materials:
1 yard solid color fabric (mine is gray)
3 yards white fabric
3 yards backing fabric
batting
binding
sewing things
You'll need to cut the following 6" squares:
22 white
22 solid color
(if mixing colors, just make sure you have 22 total)
Sew half-square triangles using your favorite method with a white half and a colored half.
This will give you 44 blocks of white/color.
Press all seams towards the colored side of your block. This will help align blocks and lock them into place later.
To make the herringbone pattern, you will need an "up" unit, and a "down" unit, each of two blocks.
This is an "up" unit.
This is a "down" unit.
(you could also call them left and right, just as long as you have two different directions)
To create the pattern, arrange an "up" set of blocks next to a "down" set. The blocks should be offset by one, and not directly side by side.
Lay out all of your blocks into four columns in this pattern. It helps me to take a picture and look at it to make sure the pattern is correct.
Sew your columns together, then your rows. Press your seams well after sewing.
Here's where you can play with the size of your quilt. I added a panel to each side of my herringbone strip. Make it slim or extra wide depending on how big you want your quilt.
Make your quilt sandwich with your backing fabric on bottom (right side down), then your batting, then your quilt top.
Baste the quilt sandwich using your favorite method, then hit the sewing machine!
You could do any kind of quilting on this piece. I opted for straight lines this time, outlining the vertical seams, then random lines on the white panels.
The quilt has great texture without being too quilted, and the straight lines are super modern.
Just for fun, I added a little strip of blue to my backing. I love it, Hubby thinks it's weird. The story of my life.
Most importantly, it looks great with our bedding, just as it was intended.
It's warm, modern, and beautiful. And with the large side panels, took very little time to put together. It was a great weekend project.

My gosh, this is beautiful! I keep telling myself one day I will make a quilt, it's just never happened. One day, one day...
ReplyDeleteThank you! Just take it one piece at a time and it will be done before you know it!
DeleteThis comment has been removed by the author.
ReplyDeleteI love the quilt! The single black strips are so striking with the contrast and simplicity.
ReplyDeleteI really really love that quilt, and it doesn't look so hard either. hmm, maybe I'll give it a try.
ReplyDeletep.s. love your blog. New follower!
Sisters, Sisters
You took the words right out of my mouth "modern and beautiful". I love the way you make this feel really achievable for a non quilter too. I also love the little contrast bit on the back (from someone else whose husband thinks their a little bit nuts sometimes too!) you need a little bit of "different" .
ReplyDeleteBeautiful quilt! I love the modern design.
ReplyDeleteThe little blue bit on the back is the "wabi-sabi" which is a Japanese tradition. The little "flaw" that makes the design more beautiful. Love it, love the quilt.
ReplyDeleteLove it! Looking for neutral quilt ideas for my son. He would love this.
ReplyDeleteHey there, I am making this quilt (its beautiful) - I was just wondering when do you put on the binding?
ReplyDeleteHey Leslie! The binding should be the last thing you do. After you have quilted your layers together, just add your binding either by machine or hand sewing. Good luck!
DeleteHi! Beautiful quillt! I'm going to try to make one for my son. What are the completed dimensions? I'm aiming for a twin size. Thanks!
ReplyDeleteWhat were the dimensions of your final quilt? I would love to do this for my guest bedroom. It is a queen bed.
ReplyDelete