Tuesday, November 29, 2011

Funky Christmas Wreath {Tutorial}

Here is the original tutorial from my guest post over at Sugar Bee Crafts.     Some of you have shown me pictures of the wreaths YOU have made, and they look awesome! I would love for you to upload them to the Flickr Group.         

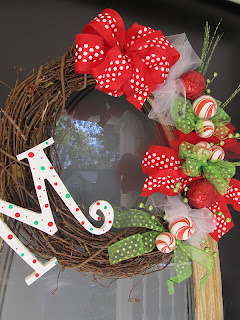
 .:*Fun and Funky Christmas Wreath*:.


I am so excited to be here at Sugarbee Crafts to share my wreath with you today!

There is nothing that says "Christmas Holidays" better than a festive wreath on the front door, waiting to welcome in family and friends! Today I'm going to show you how to put together a fun and funky Christmas wreath to brighten up the entryway to your home.


I'm Jenilyn, the author of Grits & Giggles. I love to write about my adventures in Mommyhood and Crafting. 

Let's get started!

Materials:
1 Grapevine Wreath
2 or more colors of wide wired ribbon
Spools of tulle
Wood Letter (if wanted)
Paint (for wood letter)
Embellishments (Ornaments, flowers, floral picks)
glue gun
floral wire

Start by painting your wood letter. This could be a monogram, or a word if you want to use multiple letters like in THIS wreath. Set this aside to dry as you work on the rest of your wreath.


To make a large bow for the top of the wreath, take 10" of your wired ribbon and lay it in your hand (DON'T cut it!) Fold more ribbon over and lay it back across the bottom layer. Do this several times until you have a "stack" of ribbon. I did 6 passes. If you have a pattern on one side of your ribbon, twist the middle each time to keep the patttern on top.


Pinch your ribbon stack in the middle and tie it with floral wire to keep it together.


Fluff up each of the outer loops, pulling them outward to create a full bow.


Make smaller bows in the same way, using your coordinating ribbons.


Make some ribbon "flares" by overlapping two pieces of ribbon in an X shape, and tie them off with floral ribbon.


Make some tulle poofs by very loosely wrapping tulle around your hand.


Twist floral wire around the center, then fluff for a perfect tulle poof!


Finish painting your wood letter with dots, or stripes, or anything else that feels festive to you!


Now it's time to assemble! Start by placing your large bow on your wreath using the wire you tied it off with. It doesn't have to be at the center of the top...use your imagination.


Start adding your ribbon and tulle embellishments. Since you're attaching them with wire, you can always move them if you dont' like how it looks.


Fill in gaps and holes with more ribbons until it looks nice and full.


Now it's time for the *SpArKLe*!! Get out your ornaments, candy canes, glitter, or whatever else you want to use.


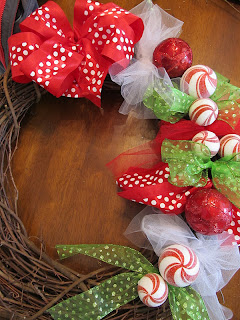
Lay your embellishments on your wreath to see how you would like them arranged. Fill in any thin spots on your wreath. Play around with it! Have some glittery flares coming out the side, add more ribbons, add candy canes, anything to make it POP!

Use hot glue to secure everything.


Add a glob of hot glue to the back of your letters, and place a piece of floral wire in the glue. This will help you attach your letter to the wreath.


Now hang your wreath on your door and admire your craftiness!


Thanks again to Sugarbee Crafts for having me over today. It's been fun! I would love for you to stop by and follow along with Grits and Giggles. Make sure you check out the tutorials page for lots of great ideas for Fall Decor, Sewing for Kids, Party Decor, Sewing for Mommy, and Gift Ideas.

Happy Holidays and Happy Crafting!

Featured at:


Sunday, November 27, 2011

Christmas Tee {Tutorial}

It's the most WoNdErFuL Time of the Year! I love the Christmas season for sooo many reasons: Jesus's Birthday, time with family, twinkly lights, pretty paper, parades.....

To get Gray in the spirit with me, she needed something festive to wear! I'm going to show you how to make this simple, but adorable Christmas Tree Tee for your little one. Seriously, this took me about 30 minutes so it's a perfect naptime project!


Materials:
Plain t-shirt
green knit (scraps, or from an old t-shirt)
red ribbon
"sewing things"


Start by cutting your green strips. I cut 7 total, 1" wide and the following lengths: 10", 9", 8", 7" 6", 5", 4". If you need a smaller tree, take out two larger strips, if you need a larger tree, add a couple to the bottom. Mine was for a size 18 month shirt.

Also cut a 5" piece of red ribbon


Now we need to make Ruffles! Set your sewing machine to its longest stitch length and sew straight down the middle of each strip. Make sure you DON'T backstitch.


Grab the bobbin thread (the bottom one) on each strip and pull to ruffle your fabric strip. Pull until you get a nice, even ruffle. The 10" strip should end up to be about 7" in length once it's ruffled.


Pull and adjust each of your ruffles until you like the shape of your tree.


Pin each ruffle on and sew down the middle onto your shirt.


Keep sewing on ruffles until your tree is done. Make sure you backstitch at the beginning and end of each strip so they stay in place.


Stitch the middle of your red ribbon to the shirt. Tie it into a bow and hand tack the bow and tails in place so it doesn't come untied.


Put the tee on your little one and spread the holiday cheer!


Don't forget to check back next week when I'll be guest posting at two AmAzInG blogs, Johnny in a Dress, and The Crafty Nest. I've got a couple more suprises for you this week too!!! Lots of Christmas cheer is coming your way!

Saturday, November 26, 2011

Big Shout Out

I wanna give a HUGE shout-out to our Volleyball Team!! We WON our league championship this week!

(Photo courtesy of my Dad's Blackberry. Sorry for the fuzz)

Now...this win is extra-super-duper exciting because we lost Every. Single. Game. of the season. We just got together at church and played for fun, decided to join a league, and found out really quick that we were a little underprepared.

There were a lot of close matches, but we never could pull out a win. The night of the Championship, we rallied to beat the teams in the bracket. It was a such a great day for our team, and it was even better to be a church family accomplishing fun and exciting things.


Thursday, November 24, 2011

Happy Thanksgiving!

{Today I am Thankful For}

All of the blessings God has given me

My loving, hard working husband

My sweet little girl and her always-smiling face

My family, who has always been there for me.

Friends who are there no matter what

A job that I love and love to do

My church family

Health and Happiness


.:I hope you and your families have a wonderful, safe, and happy Thanksgiving:.

*Don't do too much shopping Friday*

Wednesday, November 23, 2011

What I Love Wednesday

What I Love banner 
 
It's time for another What I Love Wednesday, where I get to show off what YOU have been up to this week!
 
I'm loving all of the fall and Thanksgiving themed crafts and foods I've seen floating around.
 
Natalie at Johnny In A Dress has put together a great tutorial on how to make these Darling turkey applique shirts.


Turkey Shirt Tutorial
 
 
Edible turkeys from The Seven Year Cottage


Sweet Thanksgiving Treats from Simple Girl


Candy Cornucopia
 
 
I'm always looking for cute bows for Gray, and this one is TOO cute!

Turkey Bow at Shirley's Craft Blog

What's Thanksgiving without food??? This Cranberry-Pumpkin Cake makes my mouth water just LOOKING at it.


Cranberry-Pumpkin Cake by Singing With Birds
 
 
Here's your featured button Crafty Friends!

Featured Button 
 
 
I hope you've all enjoyed the Thanksgiving goodness. Stop by these crafty blogs to check out their tutorials, as well as all of the other wonderful things they have to offer!

Tuesday, November 22, 2011

Coming Soon....

Hello Crafty Friends! I know it seems like I've been very absent from crafting lately...but it's exactly the opposite! I'm guest posting this season on THREE amazing websites and have been getting things together and lined up for them.

I hope you all got a chance to see the Christmas Wreath Tutorial over at Sugar Bee Crafts.


On December 8th, you can find me with Natalie over at Johnny In A Dress showing you how to make some adorable Christmas Carol Art. It's still in the works, but will be done very soon.

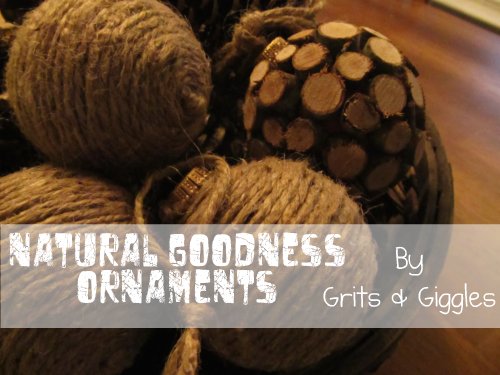
On December 9th, I'll be with Vanessa over at The Crafty Nest showing you how to make some natural, earthy goodness for your tree this year. Here's a little sneak peak....


We'll be putting the tree up on Thursday (Our Thanksgiving tradition). Too bad I can only decorate from about 3 feet and up. Gray is a climber and would terrorize the lower ornaments if I had them hanging in her reach! At least the top half of the tree will be pretty.


Sunday, November 20, 2011

No More Home Games

We've got no more home games in Death Valley this year. My Tigers did us all very proud, with a perfect record at home. They've had a few issues here lately, and the record has gone to 9-2, but that's still a great season!

We've got Carolina coming up next week which is always a BIG game...then the ACC championship! I'm glad we made it in early, because that takes a lot of pressure of the rest of the season. We'll hope for a win at the championship then see where we go "bowling."

Gray has spent the whole season shouting "Go Go Go" everytime she sees something football related. I think she's saying her Tigers are #1!

She wasn't excited for our family picture


With Nana!


We missed Adam, but he was sick, so it was best he wasn't there!


Aunt Kaileigh loves chasing Gray around.


Too. Much. Excitement.


Going to the Championship!! (We're not field rushers...but I like to watch.)


Giving her thumbs-up of approval for the Tigers...even in her sleep!


Bless her heart. Kissing the angel.


I can't resist that face.


We'll be sitting in front of the TV all weekend to see how the games play out. Good luck to everybody's team (except Carolina....sorry)! I'll pull for ya'll when you aren't playing my Tigers!!

Related Posts Plugin for WordPress, Blogger...