Showing posts with label Christmas. Show all posts

Monday, December 22, 2014

Sweater Ornaments Refashion

Do you ever look at your Christmas tree and think it needs something cozy?? I found an old sweater that was full of holes, and very ratty, but the sleeves were still good. Idea!! Christmas ornament.

Here's how to make a cozy sweater ornament in no time...

Materials:

Sewing Things
Old Sweater
Styrofoam balls

To begin, cut the sleeves off of your sweater and sew one end shut with the sleeve wrong side out. This will make a pocket for your styrofoam.


Turn the sleeve right side out, and stuff the ball inside. Hand stitch the opening on the sleeve closed.


Cut the remaining sleeve into fringe, or leave it whole. Tie a ribbon around the top and add an ornament hanger!


 How easy is that? And they look super cozy on my tree. 


Thursday, December 11, 2014

Handprint Ornaments DIY

Babies grow up all too fast don't they?? We want to preserve those little memories for as long as we can. In our house, we love decorating for Christmas. We have a collection of ornaments that are fun and sentimental that we use each and every year. To help preserve the tiny cuteness of our babies, I wanted to make some handprint ornaments this year. Here's how you can make them easily too!!


Materials:

Undecorated Glass Ornaments (from craft store)
Mod Podge or White Glue
Fine Glitter
Q-tip or small paintbrush


Paint a thin layer of glue onto your little one's hand.


Have them spread their fingers and place their hand on the ornament. For my little guy I told him to hold it like a ball, and hoped that he didn't smear it too badly.


Sprinkle fine glitter all over the handprint while it's still wet.


When it dries, brush or gently blow extra glitter off of the ornament, leaving just the pretty handprint!


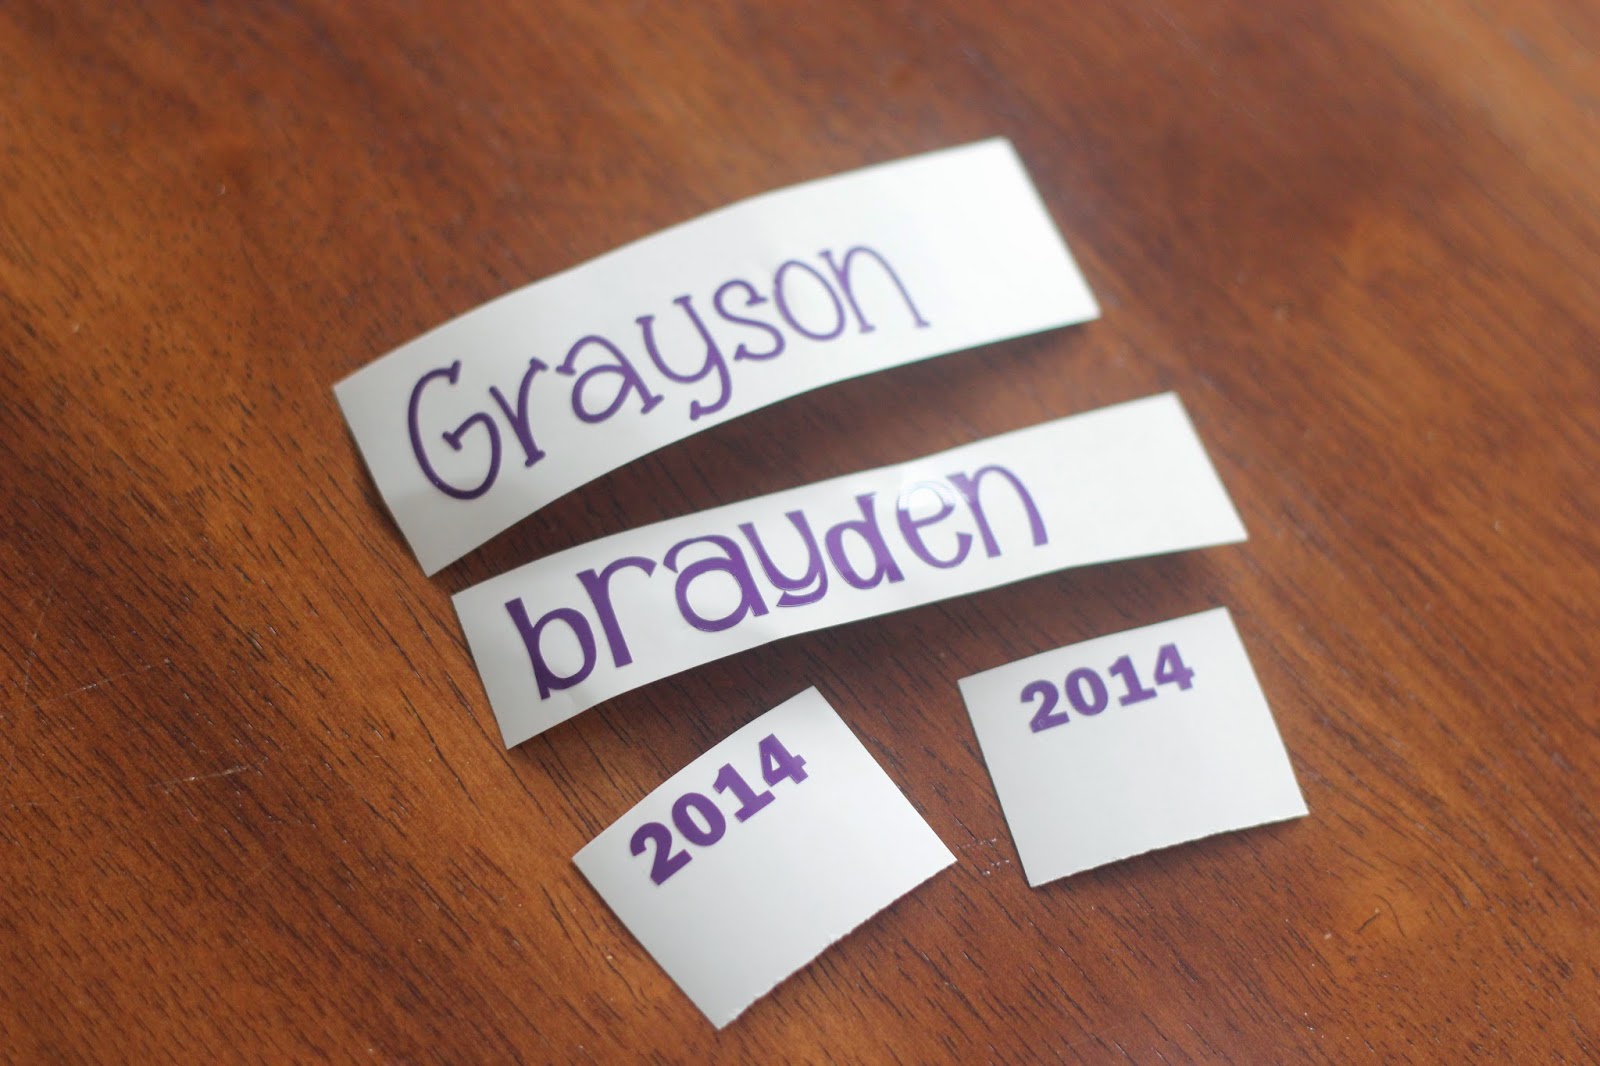
I made names and years using vinyl with my Silhouette, but you could use permanent markers or paint as well.


Place the personalization on the opposite side of the ornament from  your handprint.


Tie a ribbon on top and place it on your Christmas Tree!


These would make beautiful and personal gifts for grandparents and other family members who want to remember the sweetness of little hands too!


Monday, December 8, 2014

Paper Wheels with Graham and Brown

I was fortunate to get to work with Graham & Brown again with their wonderful wallpapers. They have the most beautiful selection of modern, bold and sleek styles for any room or decor.

I worked with the Darcy Pearl/Silver pattern for some of my Christmas decor this year.

I always do a pretty elaborate Christmas tree, filled with large objects and ornaments, so I wanted to use their papers to add even more drama to my already full tree.

I made some paper wheels to fill it up! Here's how....

Materials:

Graham & Brown Wallpaper
Stapler or Glue
Scissors


I cut my paper into 10" squares. You need two squares for each wheel.


Accordion fold your paper with creases about every 3/4" to 1" apart.
 

Fold your creased paper in half down the middle, creasing well at the center.


Unfold your paper carefully, pulling two sides of the paper together. Staple the edges together, giving you a fan shape.


Your paper will look like this when stapled.


Repeat with the other piece, then staple both fan shapes together on the edges.


I added a little cut disk of paper in the middle of my wheels, but you can leave them plain too! Add string for hanging, or just place them neatly in your tree for a bold statement!


I love large flowers and decorations in my tree, so these wheels add some definite drama.


Simply gorgeous and making quite a statement.


This is a quick, but very useful decorating craft! Even the kids could help with this one if they can fold paper.

Don't just stop at Christmas trees...these would be perfect for shower or party decorations too!

Make sure you check out the selection of beautiful papers at Graham & Brown to find the perfect paper for your holiday and home crafting.


Monday, December 1, 2014

Silent Night Printable

Printables are a fun and easy way to decorate for any holiday. Just print them out, place them in a pretty frame, and display them with your other decor!

This FREE Christmas printable is simply stated. The words to one of my favorite Christmas songs, "Silent Night" shaped into an iconic Christmas Tree. 

(The printable version has a white background. This image is for viewing only)


Click HERE to download the 5x7 PDF file
for FREE!!


Thursday, November 13, 2014

The Elf is Coming

Did you miss our Christmas in July post about the Elf on a Shelf?? Our friend Micah will be coming to visit our home soon, and if YOU have a friend coming to visit too, then you need to get your ideas together!


Click HERE to see the original post with ALL 23 ideas for your Elf. Ideas from December 1st to Christmas Eve, all toddler friendly and approved!


Thursday, July 10, 2014

Elf Box: How To...

Sometimes I look through "Elf on a Shelf" ideas and think "Nobody's got time for that", or at least I don't. Last year I wanted to make sure that our Elf's adventures were both toddler friendly, and easy to accomplish after bedtime. Because let's face it...sometimes you are ready to pass out at the first sign that your babies are in bed, and you don't want to spend another half hour getting an elf ready. 

Here are some simple tips to making a bigger elf impact, with just a few little details, and a little time. 
I did mine in advance, and keep them in a little box stored where the kids can't find it. Then it's always accessible from year to year, and everything is pre-made.

How to make items for your "Elf Box"....

For Micah's letters to his elf friends, I cut a piece of white paper into a small rectangle, and tri-folded it like a business letter. Then to add some color, and to hold it folded together, I added some stickers to the edges.

A golf pencil makes a great elf-sized pencil.


One item I used a lot was a pair of scissors from a travel sewing kit! They not too sharp, so pretty safe to be around the kids, but tiny enough for an elf.

Fold up some paper and make tiny snowflakes by cutting little holes out. Open them up to see your beautiful snowflakes! (I used regular scissors for this because they needed to be sharp.)


Lay out a cookbook and a few ingredients to make cookies for Santa! The fun, elf-sized piece here...some tiny measuring spoons. You can find measuring spoons for a "dash" "pinch" and others at some stores. These are the perfect size.


Use some scraps of fleece to make a scarf. Just cut a rectangle, then cut some fringe. No sewing required. I cut out two hat shapes from the same fleece, and sewed a couple of stitches around the edge to look like he was sewing. The tiny scissors came in handy here too.


I actually had a lot of fun with his present-wrapping. I used the tiny scissors and some ribbon to add to his pile of presents.


I wrapped a Milk Duds box and a single Starburst candy to get my tiny presents. It wasn't as hard as I thought it would be, but look so cute!


All of these little props and helpers are now in my "Elf Box" ready to use next year. I'll hopefully add a few more items this year to mix it up a bit, but it's nice to have these on standby.

Tuesday, July 8, 2014

Elf on a Shelf: for toddlers

Who wants some Christmas in July?? All crafty Mamas know that you have to plan your holiday crafting in advance, and the sooner the better. What better time than July to start thinking about this Christmas's Elf on a Shelf ideas too?

Last Christmas was the first time that Micah came to visit our house, and Goldilocks was mesmerized. Baby boy was still too young to care, but this year should be fun for him too.

He came on December 1st with a letter from Santa Claus himself letting my babies know that Micah would be staying with us until Christmas. We read his book and talked about why Santa brings presents every year.

We teach our babies that Jesus loves us soooo much that he wants us to share in the joy of his birthday by having gifts too!! 

After that first night, the fun began. Where oh where would Micah be the next morning?? The next 23 days began with tiny footsteps running through the house trying to find our elf friend. Some mornings he had hidden a little TOO much, but I always helped her find him. 

Here are 23 toddler friendly, and toddler approved Elf on a Shelf ideas for you to use in your home!


As we went to other friends houses, Goldilocks discovered that there were MORE elves than just Micah. So we had Micah write letters addressed to those elves.


 He borrows crayons to color a self-portrait.


 He left a Christmas Eve letter for the babies to tell them he would see them next year.


He gave them a little Christmas countdown.


He got caught digging for cookies in the cookie jar.


He made us some elf-sized snowflakes to enjoy.


He watched quietly from the mantle, observing their every move.


He tried baking Santa some Christmas Cookies.


He went for a ride on our antique reindeer.
 

He got caught riding the camel from our nativity scene.


He sneaked into the stockings.


He left a sign to make sure Santa knew to come by the house.


He thought he was hiding in the cereal box...but we could see him.


He used our lights as a jungle-gym.


He left messages on our ribbon plate.


He tried sewing himself a scarf and new hat.


He sat quietly in our wreath.


He wanted to be like a grown-up and get ready, so he thought about shaving!


He wrapped some elf-sized presents for his friends.


 He built himself a tower with our giant blocks.


He played card games with his lady elf friend.


He left sweet messages for the babies on our white board.


He spent the day eating candy and watching his favorite movie, "Elf" of course, with his lady elf friend.


I hope you can use some of these ideas, or inspire your own to have a little more fun with your elf this winter. I know we will when Micah comes back to visit again!


Related Posts Plugin for WordPress, Blogger...