

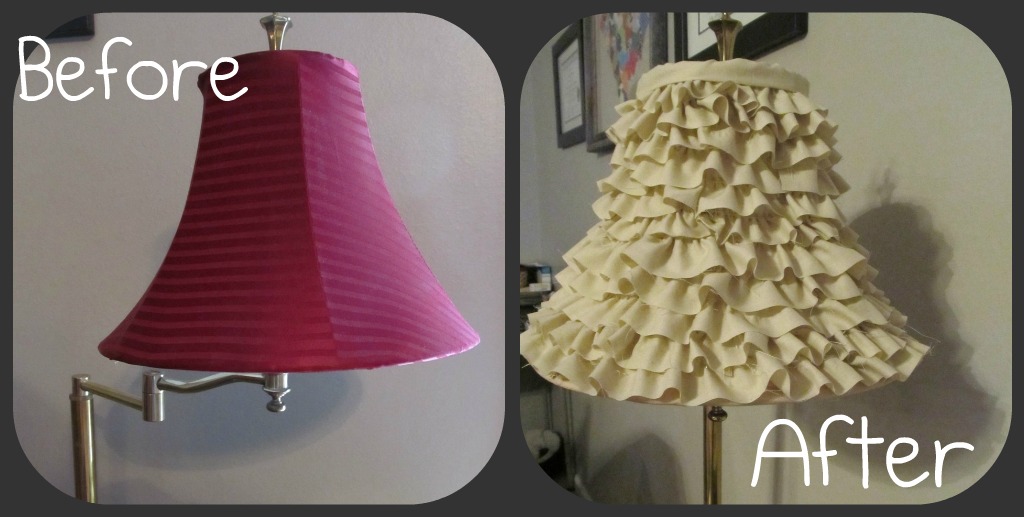
I wanted to do this lampshade for the "U-Create" project of the month, which was Lampshades! All participants do the same project using similar guidelines, and at the end of the month we see all of the wonderful things that were created!
I had a hideous lampshade that I've had since I was in college and it needed a serious facelift. I wanted it to be fun and flirty so ruffles was the answer! Let's get started!
Materials:
Lampshade
1/4-1/2 yard of fabric for your ruffles (depending on lampshade size)
hot glue gun
sewing machine to make ruffles
Start with your ugly lampshade

Take your fabric and cut it into 1.5" strips across the length of the fabric. You can make your ruffles bigger if you would like.

Destroy your lampshade! I left the underside of mine because it was neutral, but make sure you don't have a dark or bright color showing through your ruffles.

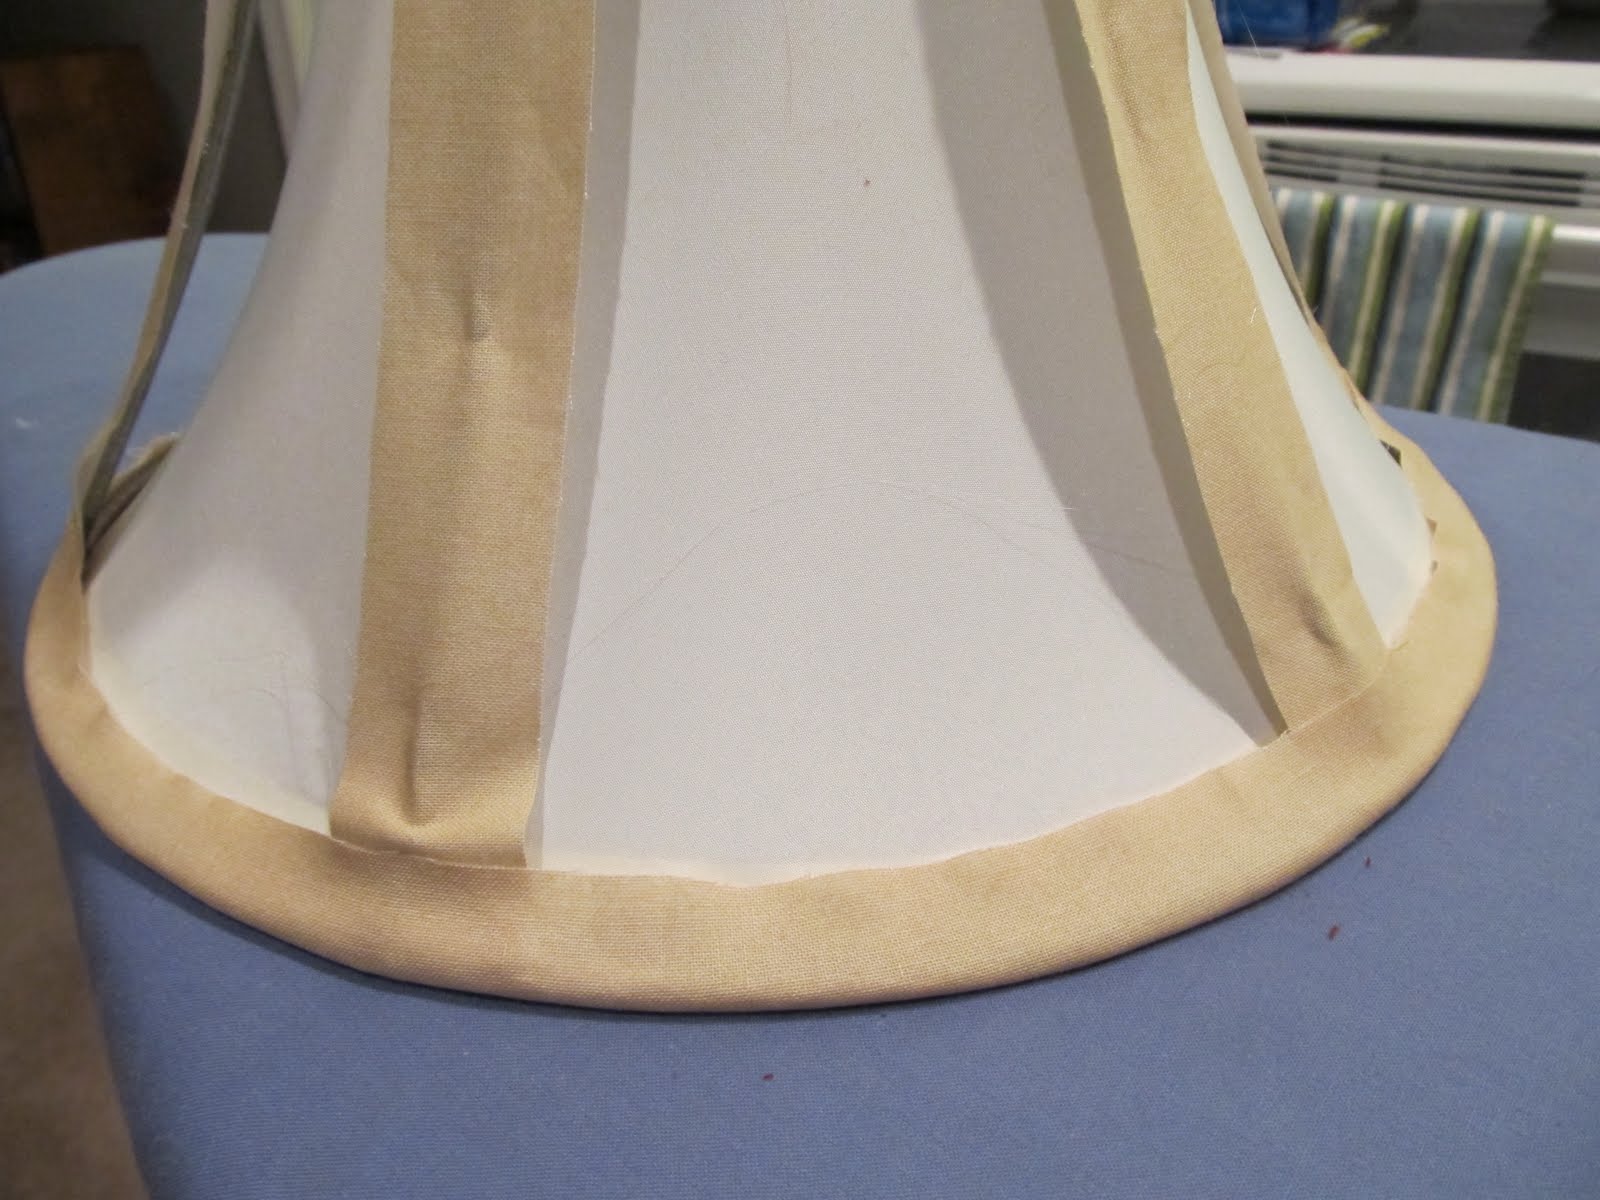
Take a few of your strips of fabric, and cover any dark spots or metal. I didn't want to see the metal through mine, so I covered them up. Place one or two strips to the side...you'll need those at the end. Don't ruffle them!

Use hot glue to cover the metal.


Now we have a nice canvas to work with.
Ruffle your fabric strips. If you've never ruffled fabric, you can use This tutorial. The tutorial is for streamers, but the concept is the same. I sewed my ruffles 1/4" from the top of the fabric strip.

Using your glue gun, begin attaching the ruffles from the Bottom of the lampshade.

When you get back to where you started, angle your ruffle up and start a new row. There's no need to cut your strip and start a new row unless you just really want to.

Keep wrapping around, gluing every few inches. Make sure you're covering the stitches on the row below the one you're gluing.

Keep going until you reach the top.

Fold one of the strips you set aside in half. Place the folded edge over the top row of stitches on the top ruffle and glue it down around the lampshade. Fold it over and glue it down on the inside, finishing your shade.

Throw it on your lamp, turn it on, and admire!!

I hope you enjoy redoing your own lampshade!! It feels great to get a whole new look for little to no money!! The total cost of this lampshade was $0! I already had the lampshade and the fabric was scraps from my fabric stash.
Happy Crafting!!
*One side note: Gray's birthday yesterday was absolutely amazing!! I have a couple more crafts to share and then we'll have the Birthday Craft Roundup!*

Hello there, well, you can't beat $o dollars, it looks very nice. I stopped over from the Tuesday hop. Congrats on being featured.
ReplyDeleteWOW! That lamp looks like a LOT of work...but definately worth it for how cute it is!! And you do love your ruffles...adoreable!
ReplyDeleteI want to make it.
I am a regular follower just checking in to catch up. See you later Jenilyn!
jenny at dapperhouse