Ya'll have absolutely BLOWN UP my inbox with requests for the Blue Waves Top tutorial. As promised....here it is!!
Obviously I didn't need another blue shirt just like the other one, so this one is orange...and I've lovingly named it the "Orange Crush Shirt"...but it's exactly the same. This one will look fabulous cheering on my Tigers this fall!
I use 1 yard of polyester knit fabric for my shirt. It's a thin, but not too see-through and very stretchy fabric. Best of all, it's usually just $4 a yard! My shirt is a tiny size 0/xs , and I use all of the fabric, so if you are making a larger size, plan accordingly with your fabric. remember if you use a knit fabric that doesn't fray, you dont' have to finish raw edges!! Score! Your fabric must have some stretch to it for this shirt to fit.
Someone REALLY needs to see some sunshine. wow.

If you've ever made a pillowcase dress....this is exactly like that. Seriously...it is. We'll just gather our fabric instead of making a casing for a ribbon.
Start by taking your measurements. I measure the widest part of my body (my hips) and add 5" to that number. Divide that number in half.
Example: if your hips measured 33" + 5", you have 38"....divide by 2 to get 19". This is the width of ONE rectangle for your body. You'll need two. The length is up to you I like mine LONG. Measure from your collarbone to the top of your jeans. This is your length for your rectangle.
You'll be adding a 5" long band at the bottom, so your shirt will actually be 5" longer than where you measured at the top of your pants....so it WILL cover your hips in the end.
Now, you will need to actually cut your band. Cut a rectangle 10" wide, and the length of your hip measurement. Don't add any length, because you want it to fit snug around your hips.
For the tie at the top of the shirt, cut a rectangle 5" wide, by at least 60" long. You can make it longer if you would like. If your fabric isn't that wide, you can sew two pieces together to add length.
Also cut two long strips (2" wide) of your fabric to use as either facing or bias tape for the underarms.
Now that you're confused (sorry) you should have:
2 rectangles for the body
1 wide rectangle for the bottom
1 long rectangle for the top
Facing/bias tape of fabric

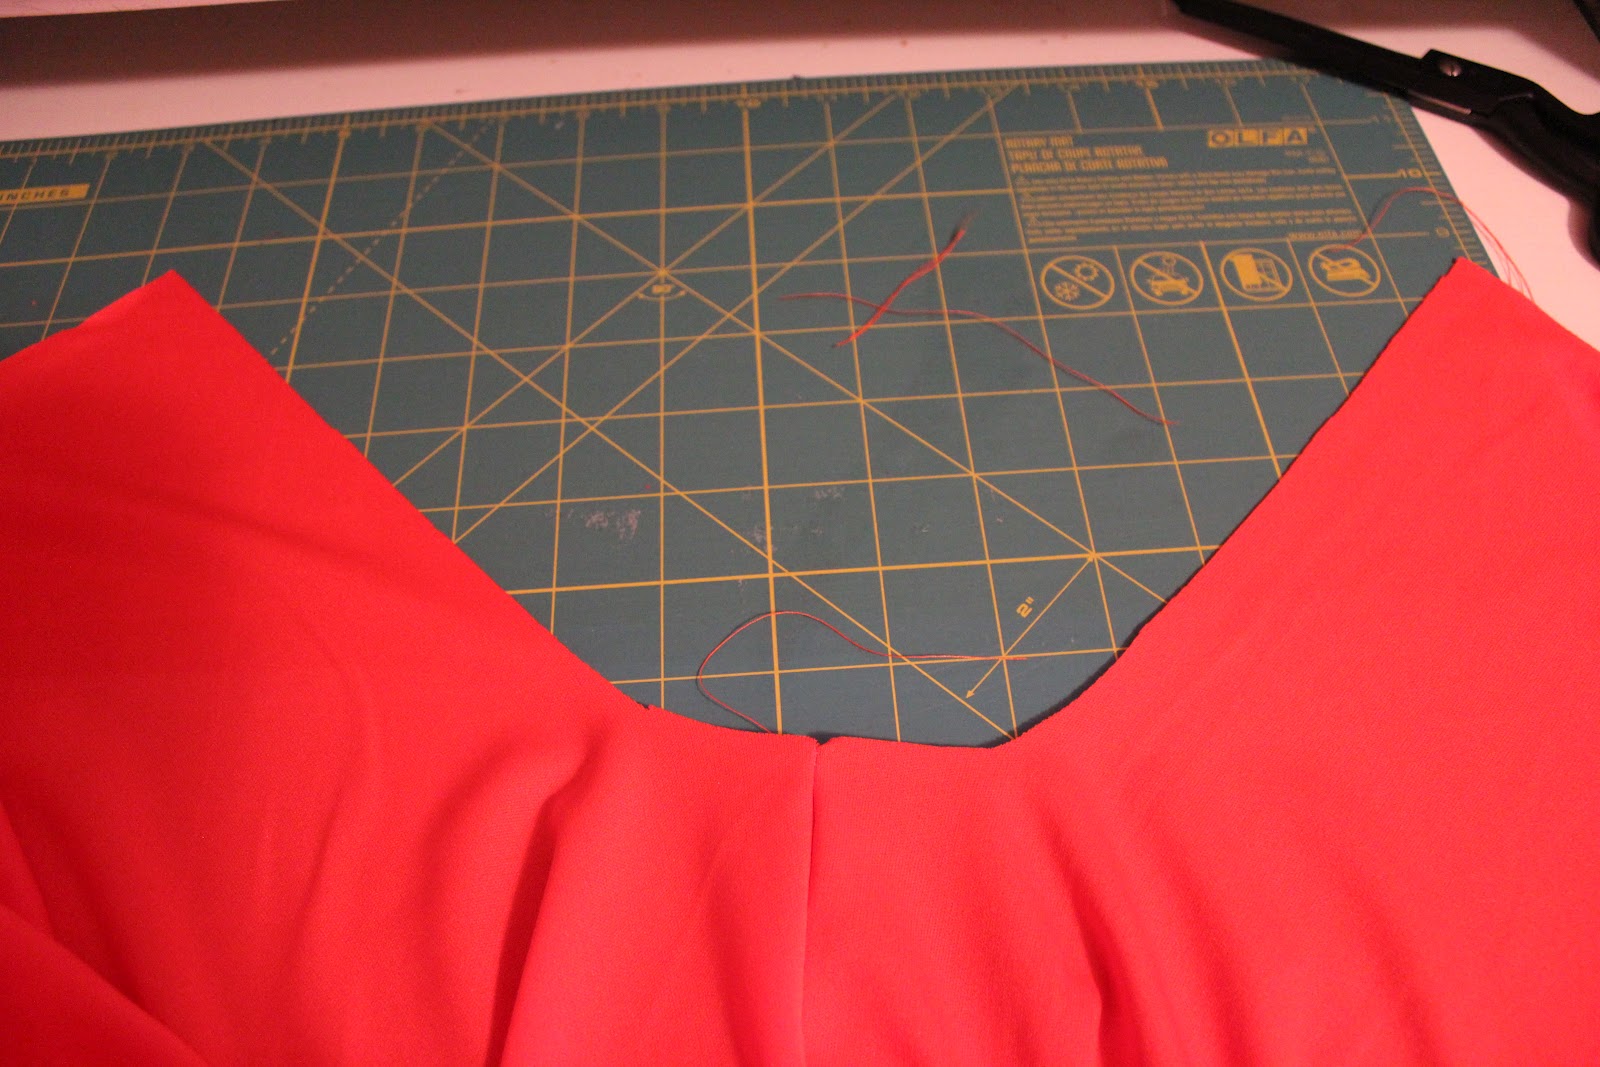
Fold your body pieces, long sides together, and cut a J-shaped armhole on the sides. Mine are about 2.5" in and 8" long. Measure a sleeveless shirt if you are unsure of how big to make them.

We'll sew the bottom band first. Place your short ends together and sew with a 1/4" seam allowance to make a wide tube. Set this aside.
*My fabric had no right or wrong side. If yours does, make sure to sew right sides together so your raw edges don't show.*

Now take your top band piece, fold it longways and stitch down the long side making a very long tube. Use a rod, pencil, etc. to turn the tube right side out.

Tuck the ends of your tube in, and sew the tube closed, hiding the raw edges.

Sew your body pieces together up both sides, from the bottom to the beginning of the underarms. Do NOT sew the underarms closed. Now fold your top out, so that your underarms make a U shape in front of you.
*Here is a super-rough example of how I do a facing for underarms. I'm sure there is a MUCH better way, but this works for me and gets me neat results.*
(If you are using bias tape, finish the underams accordingly)
For the facing, pin your strip of fabric to the outside of your garment, stretching it slightly as you pin. Sew on with a 1/4" seam allowance.

Now flip the facing over and topstitch, making sure you catch the seam allowance underneath. Use the smallest seam allowance you can next to this seam.

Now flip to the inside of your shirt. Fold the edge of your facing under, then fold the whole armhole in, with your line of topstitching, now on the inside of the shirt.

Pin well, then stitch the facing down, hiding all raw edges, and leaving a clean line of stitching on the outside of your armhole.

Now for the top. Set your machine to its longest stitch length, and sew across the top of the shirt. Pull the bobbin thread (the bottom one) to gather the top of the shirt. Repeat for the other side of the shirt. You want the length of the top of the shirt to be as wide as your neck.

Grab your top band piece, and place it on the top of your shirt, with the seam to the top. Pin all across the top to hold it in place. (I had an extra long band, so I have a seam in the middle of mine which you can see to the left.)

Sew the band on with a 1/4" seam allowance.

Flip the top around, and sew the band to the back side of the shirt. Leave a 2" gap between body pieces for the shoulders.

Flip the band up and admire your ruffly top!

Fold the bottom band in half, so that the raw edges from the seam you sewed is in between the fabric. Slip the band over your shirt bottom and pin around the bottom. You will have three layers to pin together, so make sure you catch them all.

Sew around your shirt to secure the band, flip it down, and enjoy your new shirt!!

Tie a GIANT bow.

Not a very flattering picture...but the shirt is still great!
.jpg)
Remember how it made me jump for joy???

Happy Sewing