Showing posts with label Wreath. Show all posts

Thursday, October 16, 2014

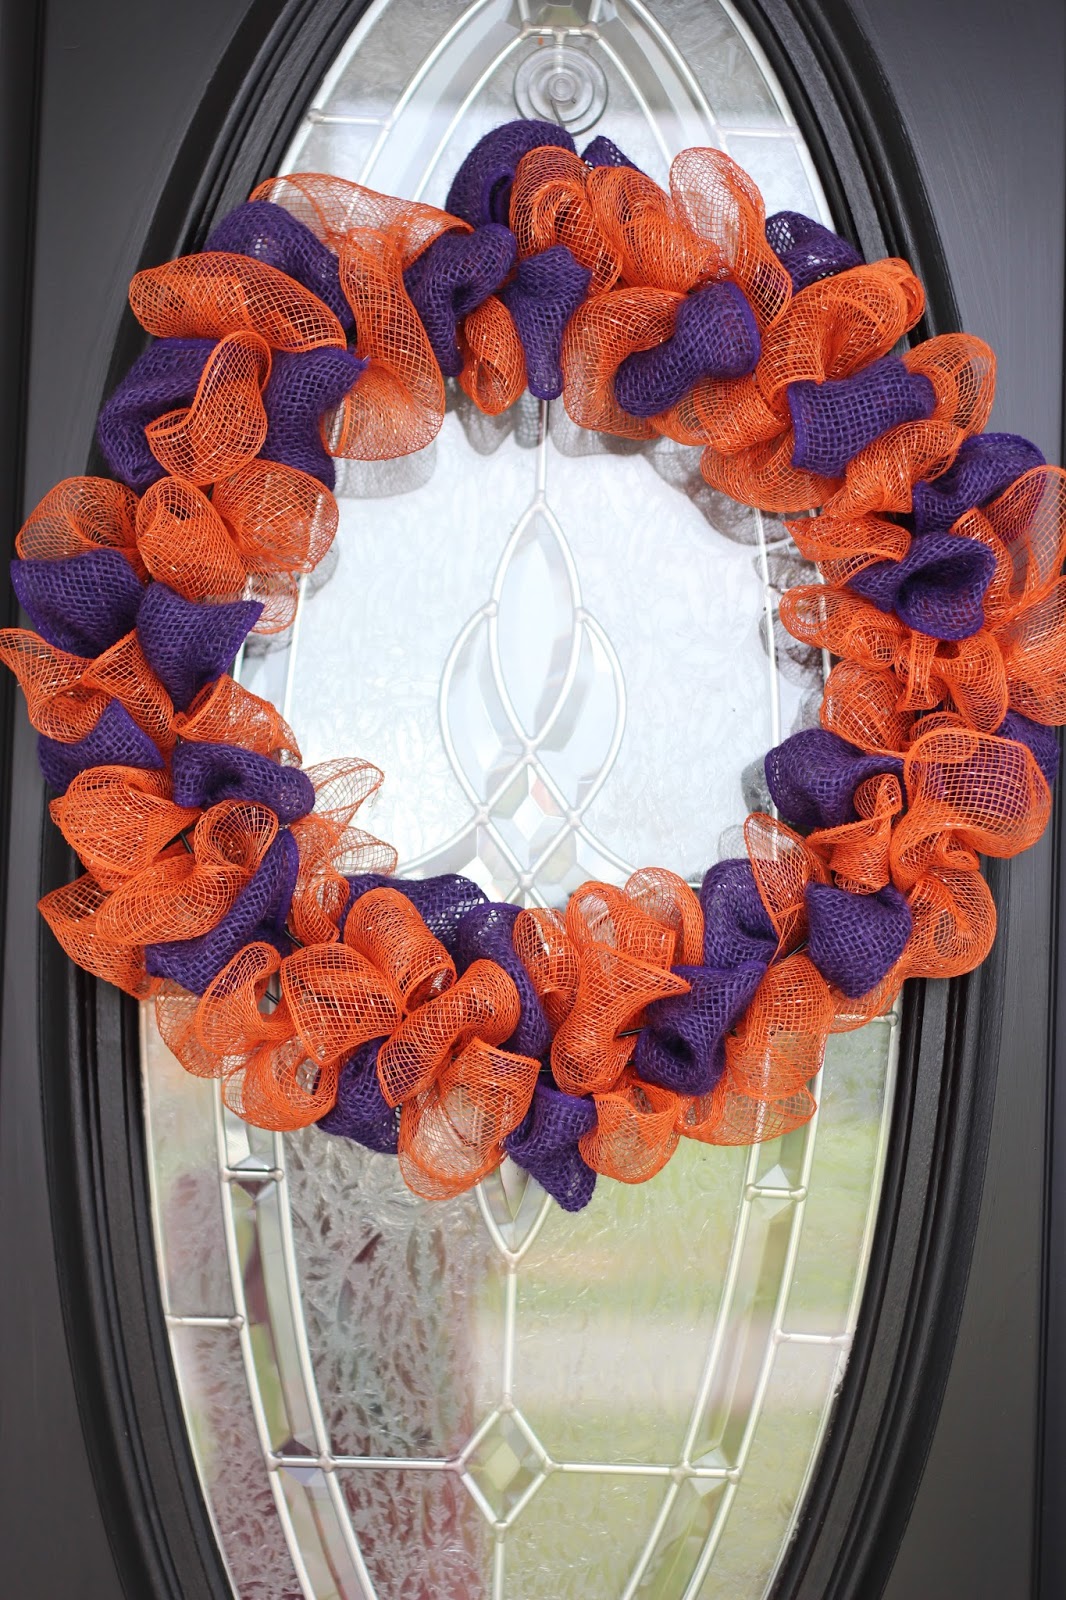
Mesh Wreath Update

You know, sometimes you can absolutely LOVE a project, but after staring at it for a while, you want to make some changes.

I have always loved our Clemson Mesh Wreath (Tutorial Here)


But after it hanging on our door for a while, I decided it needed to be a little fuller. 

A friend gave me a roll of purple burlap ribbon that she didn't know what to do with. TaaaDaaa!! I knew exactly what my wreath needed now.


The burlap added just enough volume to the wreath to make it appear much fuller, while still providing the pops of purple I love.


Add the burlap just as you would add the deco mesh. Just alternate your poofs, and tie them off with floral wire. Easy and fast!


I love a good update to an old favorite.

How about you??


Thursday, September 25, 2014

Fall Wreaths

As the weather starts to cool, we often make changes to the outside of our homes to reflect the new temperatures. Cooler weather means changing leaves and beautiful fall colors!

Here are three of our most popular wreaths (with tutorials!!) to help you spice up your front porch for fall!


I hate that these wreaths only get love for part of the year because they're soooo pretty! But it's always nice to give your front door a facelift from month to month.


Monday, June 30, 2014

Summer Wreath

My Grandmother has been admiring mine, and my brother's Year Round Wreaths and said she wanted one for her front door. She didn't want the big chevron bow though, and instead, wanted flowers. 
Mauve flowers.

Grandma is almost 97 years old...so what Grandma wants....Grandma gets. I had a HARD time finding anything "mauve" so I found some flowers that weren't all hot pink. They had some light pink mixed in too.


I didn't think I would like it, or that it would look "old", but I actually love it! It's so sweet and springy.

Best of all, she loved it too, so it's proudly hanging on her front door.  I may have to revamp our Year Round Wreath and add a flower or two!


Thursday, March 13, 2014

15 Beautiful DIY Spring Wreaths

 Even though the weather around here can't make up it's mind as to whether it will be warm or snowing... I decided I needed a little "Spring Wreath" inspiration. I thought you might like some too, so I rounded up 15 beautiful DIY wreaths perfect for Spring.


You may remember my Robin's Egg wreath from a couple of years ago. Some of these other wreaths are made of some fun and surprising materials too!


I can't believe it's almost time for spring. It's almost time for flowers and LONG days of playing outside with the babies! Can't wait.


Thursday, October 10, 2013

A Year-Round Wreath

With all of the beautiful fall wreaths out now, it was time for me to get on the ball and make ours. We have a BIG one that we use for fall, but I'm getting tired of it. We're also in between the times I like to use our Halloween Wreath and our Deco Mesh wreath.
 
Instead of making it too fall-like, I decided to make a nice year-round wreath. One big roll of jute ribbon, and some chevron burlap, and I had a beautiful wreath!
 
I made it very similar to how I made the Deco Mesh Wreath, but with less ties, since the jute was wired.
 
I used my new TOY (An embroidery machine!!! EEK!) to add some real personality to the tails of the bow. Of course, a Palmetto Tree, and our Monogram "M".


After posting a picture of it on Facebook, I got LOTS of responses for people wanting them! I was surprised and happy to see how much it was loved. Now there are many, many of these little babies on the doors of new homes.

 
While I'm in no way tired of chevron yet, I'm glad that this is more subtle. The dark gray and brown of the wreath makes it perfect to transition between holidays and seasons. My door loves it, and I love walking in to it.
 
See the Tutorials page for LOTS of DIY wreaths!

Friday, September 14, 2012

{Tutorial} Mesh Wreath

After Hubby informed me that he didn't like my moss wreath, I decided to make one that he would definitely love. He loves anything orange and purple, and with football season in full swing, it was time for a Tiger-themed door decoration. I've seen them with footballs and little helmets in them too, but I didn't want to take it that far.

Here's the new wreath!!


And here's how to put together your own.

Materials:

Wire wreath form (mine is 15")
Decor Mesh, medium width
floral wire
wired ribbon (I changed ribbon after taking my materials picture)

020

Start by cutting 2" to 3" long pieces of your floral ribbon. You'll need lots of these, maybe 30-40. Wire cutters make this easy, but you can use an old pair of scissors too.

021

Scrunch up the very end of your mesh. Poke a piece of wire through a few layers, and twist the wire to the back of the wreath form.

022

Every few inches, bunch up the mesh width-wise and thread a piece of wire through it, attaching it to the wreath.

023

Once you've gone all the way around your wreath....start over! Wrap it over and over, bunching, and filling in blank spots with more mesh. I went around my wreath a total of 3 times to get the fullness I wanted.

024

For the purple accents, just pinch the centers of pieces of ribbon, or make tiny bows like in THIS tutorial. Attach them to the wreath using the floral wire, spacing them as you wish.

079

And DONE!!! A fun and festive wreath for football, or any season. Just change up the colors for your favorite team, or your current holiday.

081

Hubby likes this one.....YES!

078 edit


Try it with burlap and mesh too!!


*Happy Crafting*

Tuesday, September 4, 2012

Summer Moss Wreath {Tutorial}

We needed a summer wreath. Nothing to flowery or overdone. I wanted simple, plain.

A moss-wreath is was!

(I have since been told by Hubby that he doesn't like this wreath. It's too plain. Ugh. Time for a Hobby Lobby trip!)

028

I got a little bit of a headache while putting it together. Even though it's simple, here's a quick how-to with a very useful tip on moss cutting.

Materials:

Foam wreath form
packaged dry moss
hot glue gun
ribbon
letter for embellishment

(I ended up not using the jute twine)


018

Here's a super-helpful tip when covering a wreath with moss...

Cut a trapezoid!!
Meaning, make one side shorter than the other when cutting your strips.

The inside diameter of your wreath is smaller than the outside, so this gives you less bunching and more coverage, with LESS cutting.

019

I used little dots of hot glue to hold the moss to the wreath form. It's pretty messy when cutting and placing, so do it in your kitchen or on an easy-to-clean surface. You can press the moss in and see where you need to add little pieces for filler.


020

Add a pretty ribbon through the wreath and hang as is for a natural, pretty summer wreath!


028

That texture is just gorgeous.


029

I decided to add a monogram to our wreath to give it a little color. Our house is yellow, so I painted the letter, added some floral wire to the back, and attached it to the wreath. This makes it less permanent so I can add other things next year.


 Warning....crappy cell phone pictures ahead.


I still love how it makes our door look, adding just enough decoration.
I had a little spy while taking pictures. She wasn't too happy that I was outside and SHE wasn't.


*Happy Crafting*

You can find other wreath ideas and tutorials HERE, HERE, HERE.
Related Posts Plugin for WordPress, Blogger...