Showing posts with label Tutorial. Show all posts

Monday, April 13, 2015

3-Seam Plastic Bag Holder {Tutorial}


How many of you have a plastic bag collection that looks like this???


Yeah...embarrassing, and  taking up space in my pantry floor. I use green bags at the grocery store, but every now and then I end up with a plastic bag coming home with me. I keep them and try to reuse them, but storing them was unsightly. So I needed a new plan...a bag holder. This little baby has only 3 seams (not including the strap) and will hold 10-15 plastic bags.

Materials:

Cotton, quilting or home decor weigh cut to 15"x18"
Elastic cut to 10" ( I used 1/2" wide, but you can use what you have)
A strap-use ribbon, or cut a piece of your fabric to 3"x18"
Sewing things

(Sure, I could have ironed my fabric before taking pictures, but I was impatiently wanting to organize. Ironing can wait.)


Take your large piece of fabric and finish the long edges first. For the top edge: turn the edge under 1/4" then another 1/4" and sew.

For the bottom, this will be a casing for your elastic. Turn the bottom up enough to fit your elastic, then turn the edge under 1/4" to hid the raw edge. Sew these two hems.


If you are making your strap from fabric, fold it in half long ways, then fold the outside edges in to the middle, This will give you a sturdy strap with no raw edges. Sew down both long edges to finish the strap.


Using a safety pin or other tool, insert your elastic into your casing. Securely sew the edges of the elastic to the edges of your fabric. 


Decide where you want your straps to go on your bag. I put my straps halfway between the edge and the middle of the rectangle that will be my bag. Remember, the bag is still flat so you can easily measure where your straps need to go if you want!

Secure the straps to the bag with a straight stitch, or make it fancy and sew a box of stitches around the bottom of the strap.


Now, fold your rectangle right sides together, and sew the main seam. Use a large zig zag stitch to finish the edges if you like.


Now, turn your bag right side out, and stuff with your bags! The elastic bottom allows you to remove the oldest bags, and the open top allows you to add new ones easily.


Hang it from your closet door, or a hook in your pantry for easy access. Now your bags are neat, off the floor, and discrete!


Thursday, March 12, 2015

DIY: Functional Desk Flowers

In an effort to make my desk prettier, but still have functional things on it, I wanted to make some flower pens! These were popular when I was in school, so I'm bringing them back!


To make your own bouquet, you will need:

Silk flowers (mine are from Hobby Lobby)
Floral stem tape
ball point pens


First, cut the flowers from the bunch, removing leaves. I cut my stems to about 5" in length. They should be shorter than your pens.


Hold your flower tightly to your pen, and using your floral tape, wrap the two together. I went down the pen first, then back up to completely cover the stem.


Put some rocks or marbles in a mason jar for a sweet pen holder, or place them in your favorite container.
I left the caps on to help the pens last longer, but you can remove them if you don't want to see them.


So simple to make, but so pretty on the desk. And they're fun to write with!!


Monday, January 19, 2015

Zippered Snack Bag {Tutorial}

Even though my babies are still a little young for school, I have already started thinking about back to school plans. I know it will be a busy time of year, so I decided to knock out a project EARLY this year, so it would be done, done, done, and out of my mind.

While doing my scrapbusting last year, I decided to use some zippers and fabric I already had on hand to make reusable snack bags, perfect for back to school lunches.


These are medium sized bags, about 7x7, so they'll fit snacks, or even half a sandwich.

You'll need:

A zipper 
two squares of outer fabric (the width of the whole zipper tape)
two squares of lining fabric
sewing things

*I used rip-stop nylon for my lining so food wouldn't stick to it, but it would still be totally washable.


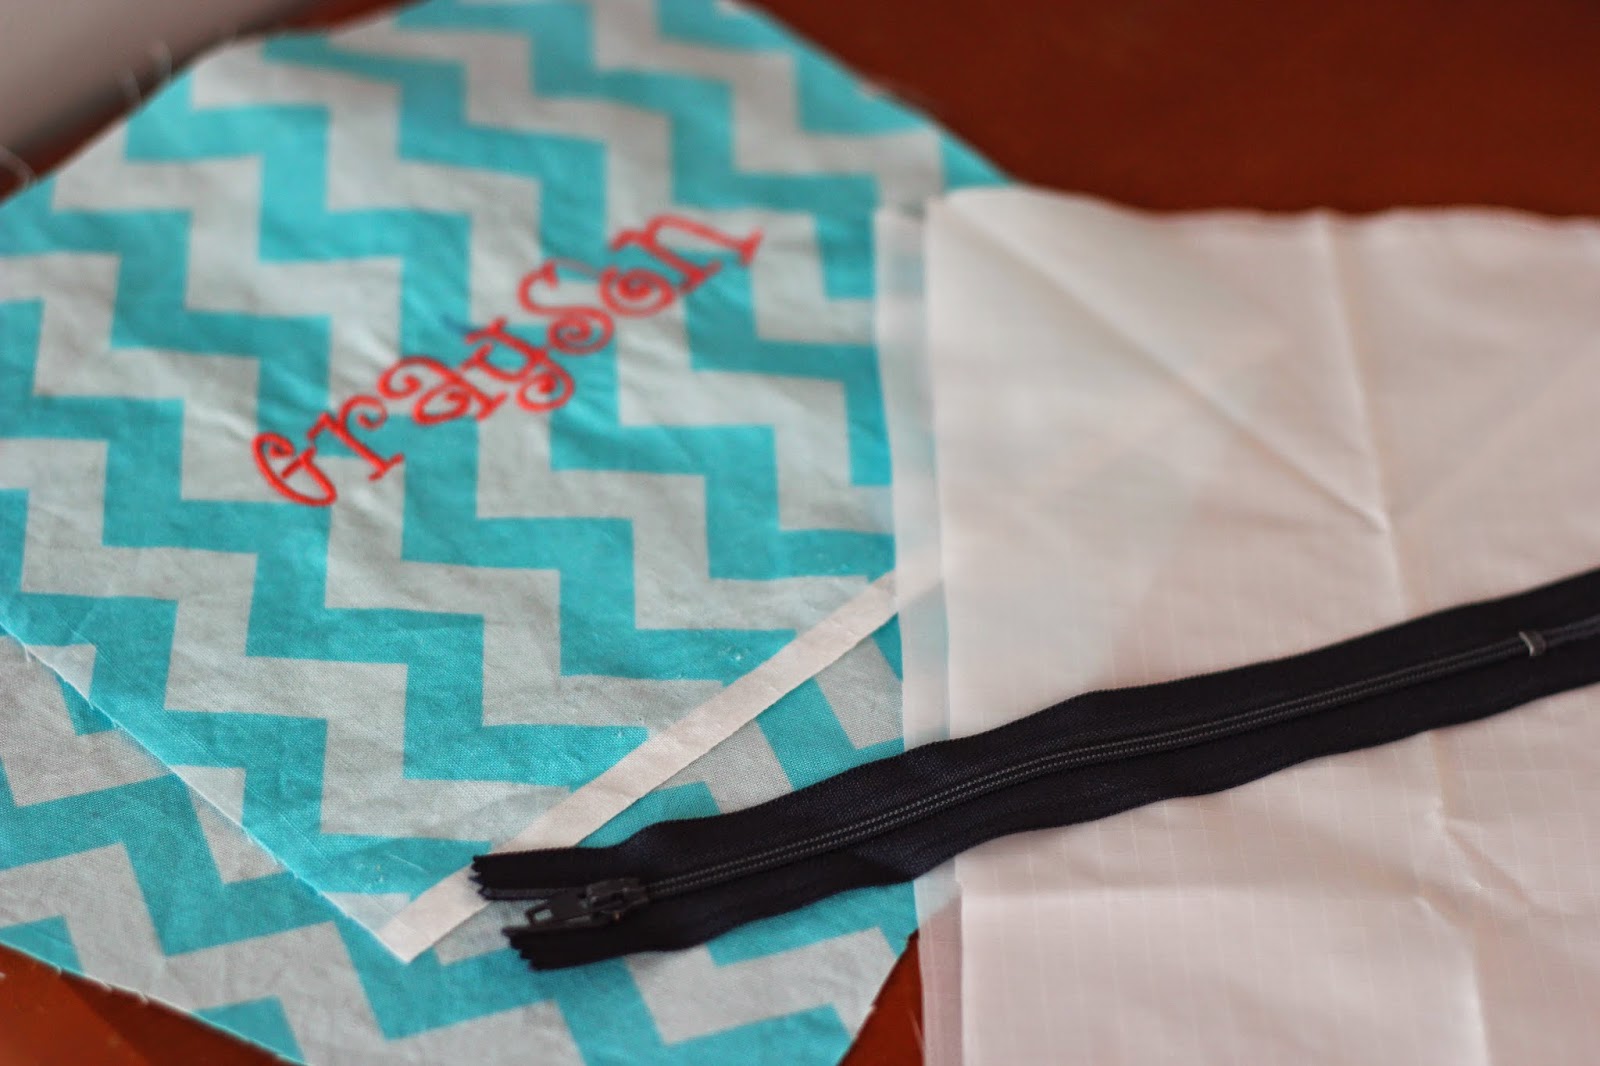
First, make a zipper sandwich. Place your lining, right side up on the table, then your zipper right side up, then your outer fabric right side down. 

Sew the three layers together, close to the zipper teeth.


When you flip the pieces over, you should have plenty of room to unzip your zipper. Make a zipper sandwich on the opposite side of the zipper, just as you did before. This will give you both sides of your bag.


Once your fabric is attached to your zipper, spread the fabrics out away from the zipper and topstitch along the edge. This will keep the fabric neat, and out of the zipper's way. 


Now, unzip your zipper halfway. DON'T forget this or you'll be angry later.

Now, flip your fabrics so that your outer layer is right sides together, and your lining is right sides together. 

Sew around the entire rectangle, leaving a small hole in the lining for turning later.


Once you've sewn your rectangle, pull the fabric through your open zipper (see, leaving it unzipped was important!). Before stuffing the lining back in, sew the hole shut that you left for turning.


Simple, quick, and best of all, cute and reusable! The kids can get these open themselves without the irritating sound of velcro! And if they get dirty, just throw them in the washing machine.


Now, I'll put them away and hope it's a long long time before I need them!!


Thursday, December 11, 2014

Handprint Ornaments DIY

Babies grow up all too fast don't they?? We want to preserve those little memories for as long as we can. In our house, we love decorating for Christmas. We have a collection of ornaments that are fun and sentimental that we use each and every year. To help preserve the tiny cuteness of our babies, I wanted to make some handprint ornaments this year. Here's how you can make them easily too!!


Materials:

Undecorated Glass Ornaments (from craft store)
Mod Podge or White Glue
Fine Glitter
Q-tip or small paintbrush


Paint a thin layer of glue onto your little one's hand.


Have them spread their fingers and place their hand on the ornament. For my little guy I told him to hold it like a ball, and hoped that he didn't smear it too badly.


Sprinkle fine glitter all over the handprint while it's still wet.


When it dries, brush or gently blow extra glitter off of the ornament, leaving just the pretty handprint!


I made names and years using vinyl with my Silhouette, but you could use permanent markers or paint as well.


Place the personalization on the opposite side of the ornament from  your handprint.


Tie a ribbon on top and place it on your Christmas Tree!


These would make beautiful and personal gifts for grandparents and other family members who want to remember the sweetness of little hands too!


Monday, September 8, 2014

Drying Herbs at Home {Tutorial}

I love fresh herbs. I love to watch them grow, and cook with them, and even cut some off just to smell in my kitchen. They're great to have around. But what if you have TOO much? Or what if the winter is getting closer and your beloved herbs aren't going to make it? Then it's time to do some drying and storing. 

I am  no expert in drying herbs. I'm sure there are a million ways to do it, and something different for each kind of herb, but this is what works for me. I use a simple dehydrator (like for making jerky) but an oven at a low temp could work too.

I don't have time or space to hang bunches of herbs in my closets and wait for them to dry, so this is my quick, afternoon method of drying herbs at home.


My basil plant is out of control. I mean...it's HUGE. The smell is amazing, and I hate to throw any of it away. So I'm slowly cutting and drying it for later use. The dry herbs are just as delicious and have a long shelf life. 


Trim a few branches off of your plant. The smaller leaves of basil are the sweetest, so I tried to get the smaller branches.


Give them a quick rinse to clean them off.


Pull the leaves off of the stem and pat them dry on a towel. Then lay them out in a single layer on your dehydrator. If your dehydrator has multiple layers, use as many as you need and fill them up!


I ran my dehydrator for just 1 hour, and the herbs were finished drying. They should be completely crunchy when they're done. They loose their brilliant color, but they still smell and taste great.


Place the herbs in a sealed bag, jar, or container. Anything with a good airtight seal will work. 


These would make an adorable and thoughtful gift too! Tie some twine around your jar and add a label for a sweet gift that will last.


*I have only tried basil and parsley so far, as those are what I had on hand that needed drying. Drying times will vary for other herbs.


Thursday, August 28, 2014

Ruffled Camera Strap Cover {Tutorial}

I made myself a ruffled camera strap a couple of years ago, but never took a picture of it because...well...it's on my camera. I love it. When my sis-in-law got a brand new camera for her birthday, she wanted a girly and fun camera strap too! 


Here's how I put hers together. 
*each camera strap is different. I don't include measurements. This is just a general guide to making a ruffled camera strap.


Materials:
Outer strap fabric (will show the ruffle)
Bottom fabric (will be against your neck)
batting or padding material (mine is pink fleece)
ribbon
sewing things


Cut a strip of your top fabric twice as long as the camera strap (measuring only the middle, leather or vinyl part)
Make your strip about 3" wider than your camera strap width. You will trim extra width later.

Set your sewing machine to its longest stitch length, and sew a line down the middle of the length of your top strap piece. 


Grab the bobbin thread (the one on bottom) and gently pull, ruffling your fabric. 


Continue ruffling until your fabric is 1" longer than the camera strap section you will be covering.


Iron your ruffles down to make them nice and flat.


Cut your batting and bottom fabric the length of your camera strap + 1". It will be the same length as your ruffle fabric piece now.


Lay the batting and bottom fabric right sides together, and sew a few stitches to hold them together. You can sew them long ways, width ways, or get fancy and do some swirls. Just as long as the two pieces are now one.


Cut a piece of ribbon a couple of inches longer than your ruffle piece. Sew down both sides of the ribbon, covering your gathering stitch, down the middle of the ruffle piece.


Lay your bottom piece on the ruffled piece, right sides together.


Sew down ONE long side of the strap cover. Use pinking shears to trim off extra fabric from the seam allowance.


Open your strap cover up, and it's time to finish the edges. Fold the end in 1/4" towards the wrong side, then fold again 1/4". Pin and sew across, hiding the raw edges. Do this for both ends.


Now, fold your strap cover right sides together, and sew the other long side closed. Use pinking shears to trim extra seam allowance. Make sure first that you have a wide enough opening for your strap to go through!


Now the fun part. Using a turning tool, a knitting needle, chopstick, etc., turn the strap right side out. This can take patience. 


Once it's turned, it's time to insert your camera strap! Use a tool, ribbon, or other method to feed your strap through. This can also take patience. 


Now throw it back on your camera and take some pictures! 


*I will say, while these strap covers are adorable and comfy, it does make the camera harder to fit into more compact cases and bags. It's never really bothered me, but it's something to think about if you carry your camera around a lot!
Shutterfly Baby Pictures 300x250

Related Posts Plugin for WordPress, Blogger...