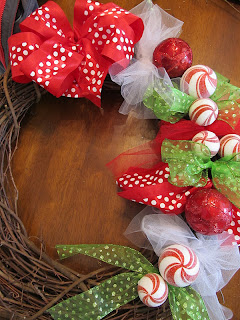
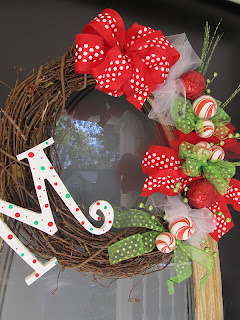
Here is the original tutorial from my guest post over at Sugar Bee Crafts. Some of you have shown me pictures of the wreaths YOU have made, and they look awesome! I would love for you to upload them to the Flickr Group.
.:*Fun and Funky Christmas Wreath*:.
I am so excited to be here at Sugarbee Crafts to share my wreath with you today!
I'm Jenilyn, the author of Grits & Giggles. I love to write about my adventures in Mommyhood and Crafting.
Let's get started!
Materials:
1 Grapevine Wreath
2 or more colors of wide wired ribbon
Spools of tulle
Wood Letter (if wanted)
Paint (for wood letter)
Embellishments (Ornaments, flowers, floral picks)
glue gun
floral wire
Start by painting your wood letter. This could be a monogram, or a word if you want to use multiple letters like in THIS wreath. Set this aside to dry as you work on the rest of your wreath.
To make a large bow for the top of the wreath, take 10" of your wired ribbon and lay it in your hand (DON'T cut it!) Fold more ribbon over and lay it back across the bottom layer. Do this several times until you have a "stack" of ribbon. I did 6 passes. If you have a pattern on one side of your ribbon, twist the middle each time to keep the patttern on top.
Pinch your ribbon stack in the middle and tie it with floral wire to keep it together.
Fluff up each of the outer loops, pulling them outward to create a full bow.
Make smaller bows in the same way, using your coordinating ribbons.
Make some ribbon "flares" by overlapping two pieces of ribbon in an X shape, and tie them off with floral ribbon.
Make some tulle poofs by very loosely wrapping tulle around your hand.
Twist floral wire around the center, then fluff for a perfect tulle poof!
Finish painting your wood letter with dots, or stripes, or anything else that feels festive to you!
Now it's time to assemble! Start by placing your large bow on your wreath using the wire you tied it off with. It doesn't have to be at the center of the top...use your imagination.
Start adding your ribbon and tulle embellishments. Since you're attaching them with wire, you can always move them if you dont' like how it looks.
Fill in gaps and holes with more ribbons until it looks nice and full.
Now it's time for the *SpArKLe*!! Get out your ornaments, candy canes, glitter, or whatever else you want to use.
Lay your embellishments on your wreath to see how you would like them arranged. Fill in any thin spots on your wreath. Play around with it! Have some glittery flares coming out the side, add more ribbons, add candy canes, anything to make it POP!
Use hot glue to secure everything.
Add a glob of hot glue to the back of your letters, and place a piece of floral wire in the glue. This will help you attach your letter to the wreath.
Now hang your wreath on your door and admire your craftiness!
Thanks again to Sugarbee Crafts for having me over today. It's been fun! I would love for you to stop by and follow along with Grits and Giggles. Make sure you check out the tutorials page for lots of great ideas for Fall Decor, Sewing for Kids, Party Decor, Sewing for Mommy, and Gift Ideas.
Happy Holidays and Happy Crafting!
Featured at:


