Showing posts with label Shirt. Show all posts

Saturday, July 21, 2012

Dolman Sleeve Top {Tutorial}

I love dolamn sleeve tops. They're so loose and flattering, perfect for summer. I've only found a couple that I love in stores, and wanted more, so I thought about making my own.

I found this sweet little knit at our fabric store and knew it would be perfect. The red is knit, and the cream is a tightly-knit lace, making it super girly.

Here's a little tutorial on how I put mine together. It's not as in-depth as my usual tutorials, but it gets the job done!

Start with about 1 1/2 yards of stretchy knit. Make sure it's not too heavy so it drapes nicely.

I measured across my body from elbow to elbow with my arms stretched out for my width. Then I measured from my collarbone down to my hips for the length. We'll be adding a band later to add some length.

Cut out two rectangles of these demensions. Line up the stripes on the sides if you can!
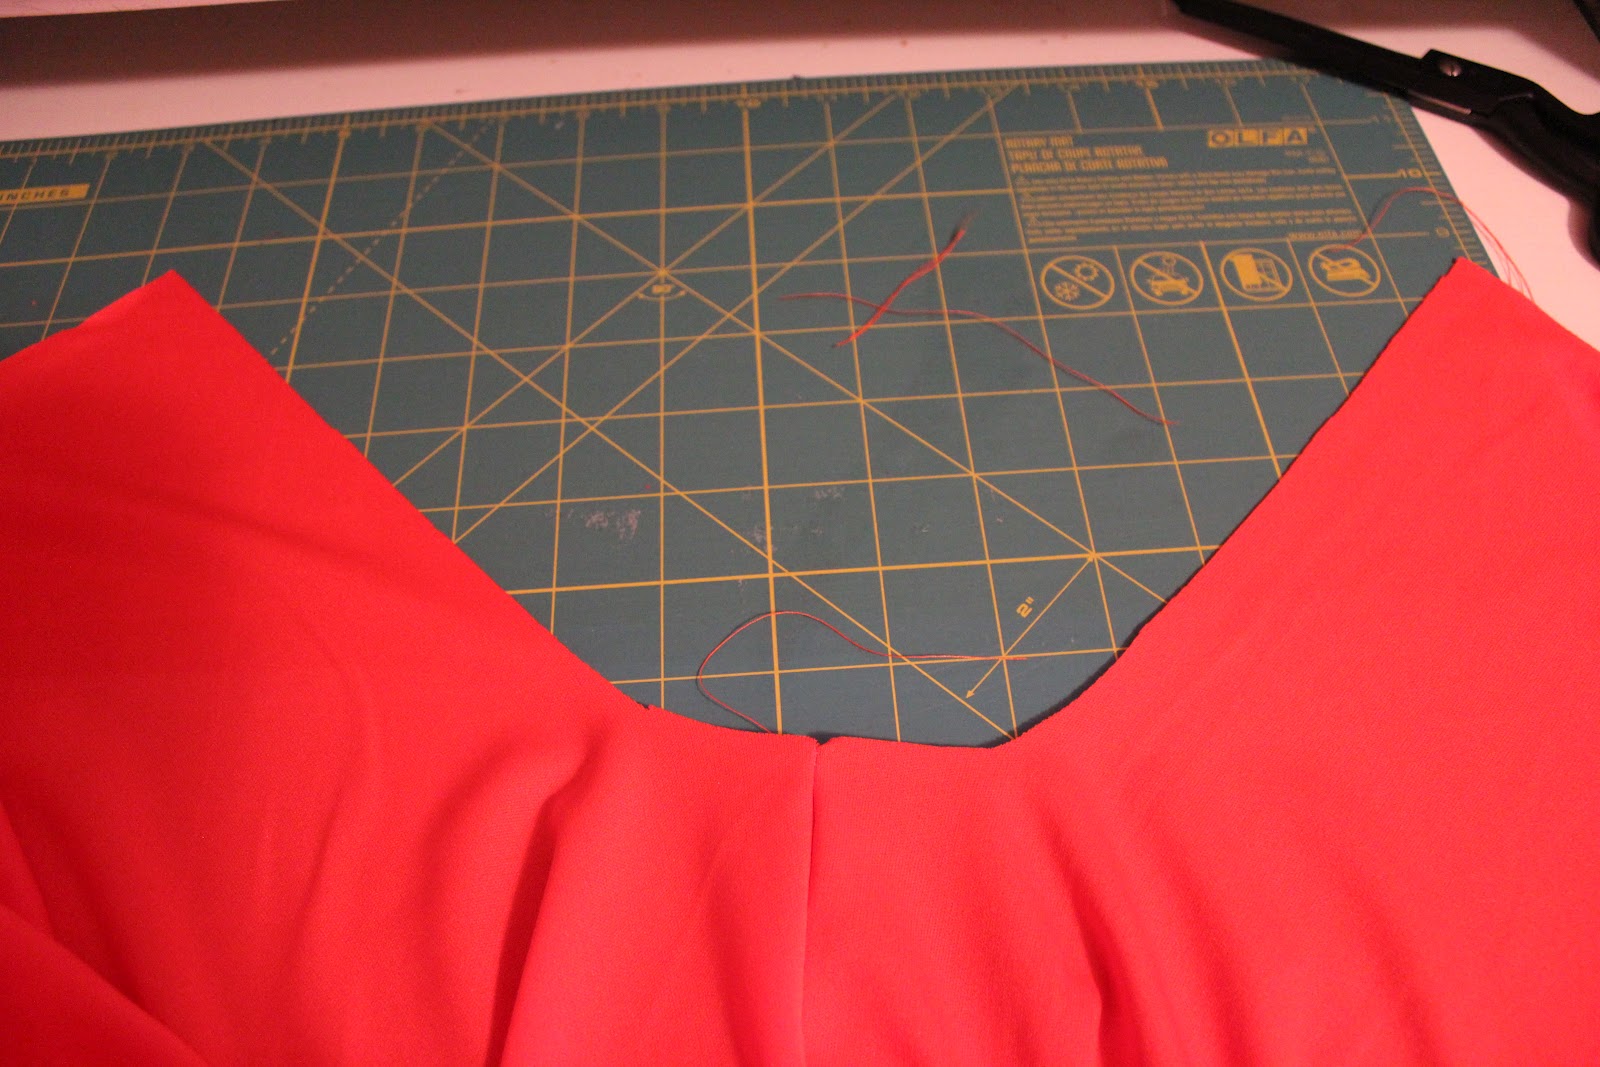
Then using a shirt you already have, cut out a neckline on the front and back. I made mine the same on both sides.


This is where you use your imagination. Cut a slight angle down for the sleeve from the neck of the shirt. Then cut a couple of wonky "U" shapes under the arms to complete the sleeves. Leave yourself plenty of room under the arms, the looser the fit the airier it is.

The bottom will be too big...this is okay, we'll fix it later.

Sew the shoulder seams, the underarms and down the sides with your fabric right sides together.


For the bottom  band, measure around your waist exactly. You want the band to be fitted to your hips, the knit will stretch to help it fit. Measure from your hips how much length you want to add, then double that. You'll be folding the band in half.

Fold the short ends of the band together and stitch the ends making a tube.


Fold your band in half, hiding the edges of this seam in the middle.

Slip the band over the bottom of your shirt, with the raw edges at the bottom.
See This Tutorial for more pictures on how to do it.

Sew the band to the shirt, catching all the layers as you go. You'll have to stretch the band as you sew to get all the shirt fabric, but it will gather nicely once you're done!


I made my neckline a little too wide, so I added a little gathering stitch in the middle and drew it in some. I ended up really liking how this looks!


Make some bias tape with your knit and fold it over your raw neckline to finish it off. I left my sleeves unfinished because they draped better, and knit doesn't fray!


Steam your seams really well to give them a pollished look, and you're done!!


One super-drapey dolman sleeved top.


Okay, not the most flattering picture, but you get the point! It's drapey, and hip-hugging, and wonderful.


It was perfect for the heat and humidity of Charleston.


Queen Street....yes. In my own little world.


*Happy Sewing*

Featured on...

Craft DIY Ideas

Thursday, April 12, 2012

{Tutorial} Orange Crush Shirt


Ya'll have absolutely BLOWN UP my inbox with requests for the Blue Waves Top tutorial. As promised....here it is!!

Obviously I didn't need another blue shirt just like the other one, so this one is orange...and I've lovingly named it the "Orange Crush Shirt"...but it's exactly the same. This one will look fabulous cheering on my Tigers this fall!

I use 1 yard of polyester knit fabric for my shirt. It's a thin, but not too see-through and very stretchy fabric. Best of all, it's usually just $4 a yard! My shirt is a tiny size 0/xs , and I use all of the fabric, so if you are making a larger size, plan accordingly with your fabric. remember if you use a knit fabric that doesn't fray, you dont' have to finish raw edges!! Score! Your fabric must have some stretch to it for this shirt to fit.
Someone REALLY needs to see some sunshine. wow.

If you've ever made a pillowcase dress....this is exactly like that. Seriously...it is. We'll just gather our fabric instead of making a casing for a ribbon.

Start by taking your measurements. I measure the widest part of my body (my hips) and add 5" to that number. Divide that number in half.
Example: if your hips measured 33" + 5", you have 38"....divide by 2 to get 19". This is the width of ONE rectangle for your body. You'll need two. The length is up to you I like mine LONG. Measure from your collarbone to the top of your jeans. This is your length for your rectangle.

You'll be adding a 5" long band at the bottom, so your shirt will actually be 5" longer than where you measured at the top of your pants....so it WILL cover your hips in the end.

Now, you will need to actually cut your band. Cut a rectangle 10" wide, and the length of your hip measurement. Don't add any length, because you want it to fit snug around your hips.

For the tie at the top of the shirt, cut a rectangle 5" wide, by at least 60" long. You can make it longer if you would like. If your fabric isn't that wide, you can sew two pieces together to add length.

Also cut two long strips (2" wide) of your fabric to use as either facing or bias tape for the underarms.

Now that you're confused (sorry) you should have:

2 rectangles for the body
1 wide rectangle for the bottom
1 long rectangle for the top
Facing/bias tape of fabric

Fold your body pieces, long sides together, and cut a J-shaped armhole on the sides. Mine are about 2.5" in and 8" long. Measure a sleeveless shirt if you are unsure of how big to make them.


We'll sew the bottom band first. Place your short ends together and sew with a 1/4" seam allowance to make a wide tube. Set this aside.

*My fabric had no right or wrong side. If yours does, make sure to sew right sides together so your raw edges don't show.*


Now take your top band piece, fold it longways and stitch down the long side making a very long tube. Use a rod, pencil, etc. to turn the tube right side out.


Tuck the ends of your tube in, and sew the tube closed, hiding the raw edges.


Sew your body pieces together up both sides, from the bottom to the beginning of the underarms. Do NOT sew the underarms closed. Now fold your top out, so that your underarms make a U shape in front of you.


*Here is a super-rough example of how I do a facing for underarms. I'm sure there is a MUCH better way, but this works for me and gets me neat results.*
(If you are using bias tape, finish the underams accordingly)

For the facing, pin your strip of fabric to the outside of your garment, stretching it slightly as you pin. Sew on with a 1/4" seam allowance.  


Now flip the facing over and topstitch, making sure you catch the seam allowance underneath. Use the smallest seam allowance you can next to this seam.


Now flip to the inside of your shirt. Fold the edge of your facing under, then fold the whole armhole in, with your line of topstitching, now on the inside of the shirt.


Pin well, then stitch the facing down, hiding all raw edges, and leaving a clean line of stitching on the outside of your armhole.


Now for the top. Set your machine to its longest stitch length, and sew across the top of the shirt. Pull the bobbin thread (the bottom one) to gather the top of the shirt. Repeat for the other side of the shirt. You want the length of the top of the shirt to be as wide as your neck.


Grab your top band piece, and place it on the top of your shirt, with the seam to the top. Pin all across the top to hold it in place. (I had an extra long band, so I have a seam in the middle of mine which you can see to the left.)


Sew the band on with a 1/4" seam allowance.


Flip the top around, and sew the band to the back side of the shirt. Leave a 2" gap between body pieces for the shoulders.


Flip the band up and admire your ruffly top!


Fold the bottom band in half, so that the raw edges from the seam you sewed is in between the fabric.  Slip the band over your shirt bottom and pin around the bottom. You will have three layers to pin together, so make sure you catch them all.


Sew around your shirt to secure the band, flip it down, and enjoy your new shirt!!


Tie a GIANT bow.


Not a very flattering picture...but the shirt is still great!

Remember how it made me jump for joy???


Happy Sewing


Saturday, March 31, 2012

The Blue Waves Top

This is top #2 for the Spring Top Sewalong at Made By Rae. The first top was the Pintucked J. Crew Knock Off.

 I have been wanting to try sewing with new fabrics, and I decided to try my hand at polyester knit. Oh. My. Gosh. This fabric is amazing. I usually love "natural" fabrics, but this knit doesn't wrinkle, it doesn't fray, it doesn't curl, and it sews like a dream. Not to mention it is stretchy so is super comfortable to wear.

I like wearing sleeveless shirts, but I don't love low necklines, so a hight neckline was on my list of must-haves. And I can never find shirts long enough, so I wanted to suuuuper long to fit nice and low on my hips.

The Blue Waves Top was born.


I wish ya'll could feel how comfortable this top truly is.
One day you might...because I WILL be making another one soon, and there WILL be a tutorial. I know how ya'll love DIY's.


It's snug in the hips, and lose around my tummy. I don't worry about straps slipping with a nicely tied bow around the shouler.


Perfect for a night out, or relaxing at home.
(or outside on the park bench)


It makes me jump for joy.


Tuesday, March 20, 2012

J. Crew Knock-Off {Tutorial}

It's Spring Top Week over at Made By Rae and this year I get to participate! I just missed it last year because...I didn't know how to sew. Now that we've solved that problem, I'm excited to show you my inspiration.

I saw this sweet little shirt at J. Crew and fell in love. I loved the pintuck-pleated neckline. I didn't, however, like the price. $58. No thank you.


So I decided to recreate one for myself. Only instead of linen, I wanted to use knit, and wanted a few less pleats. I also made it extra long, because I can never find shirts as long as I like them.

(How do we feel about the curls?? I'm loving them right now.)

I decided to angle my pintucks to create a more unique shape rather than sew them straight down.


Want to make your own??
It's super simple and you may could even do it to a shirt you already own!

First, cut a front and back out of knit, using a tank you already have that fits well. Add just a little extra width to the front where you'll be doing the pintucks.


Fold your front piece in half, WRONG sides together and pin down the middle at the top.


Sew with an itty-bitty seam allowance as far down as you want the pleated look to go. I went the deepest on the middle pleat.


Move over about 1/4" and make another pleat on each side of  the middle one.


Keep going until you have as many as you want. You can do the back too, but I only wanted the front.

Iron your pleats from the back to open up your fabric.


Make some bias tape out of your knit and sew it onto the neckline to finish it.


Finish your armholes as desired, by roll-hemming or using bias tape, then sew the shoulders and sides together.


You've got a very sweet, J. Crew-esque top!


I wore this the other day and Hubby asked me where I bought it. SCORE!! I love it when things don't LOOK homemade. And the shirt is super comfy, so it will get lots of love this summer.


As seen on CraftGossip.com
Related Posts Plugin for WordPress, Blogger...