Showing posts with label Remodel. Show all posts

Thursday, January 16, 2014

Bathroom Printables

Every now and then an update is in order. This one is long overdue. We've had our sweet baby boy in the house for almost a year now, yet the kids bathroom is still pink and green. Whoops. I didn't want to do a total overhaul, so I thought that changing one color would be sufficient. I swapped the pink for gray and that did the trick!
 
We had three picture frames on the wall with pink flowers...those had to go. I kept the green frames and made some bathroom printables to fill the frames.


And because sharing is caring....
Here are the printables for YOU!

I made them in 4 bathroom-friendly colors to hopefully match your décor.

Just right click and "save as".
These fit in an 8x10 frame with a small white border. You can resize to fit your needs.


Happy Decorating!
 

Monday, January 6, 2014

Bed Sheet Curtains {Tutorial}

When I was planning our Bedroom Redo, I had to make sure we had fresh new curtains to match our new color scheme. Have you shopped for curtains lately? YIKES! They cost a LOT, and I needed 4 panels for the windows in our room. Not good on the budget. I also had a hard time finding plain, white curtains.
I decided if I couldn't find what I needed...I would just have to make it! Isn't that what a crafty lady should do??
White fabric would have been just fine, but I wanted to cheat a little bit. I decided, if I used bed sheets...then a lot of the hemming and finishing would already be done for me. Off to Walmart I went. You can buy  a queen flat sheet for around $15. Sure beats the pants of off the $40 a panel at some stores! And for that $15, I was getting TWO panels. So two flat sheets and $30 later, I had two beautiful matching sets of curtains, with little effort.
Here's how....


A Queen flat sheet was perfect for me. It was a good length to hang to the floor, with enough fullness to cover the window. If you want more fullness, go for a king size sheet. They are the same length, but you'll have a fuller top.

Materials:

1 Queen flat sheet (per window)
Sewing things

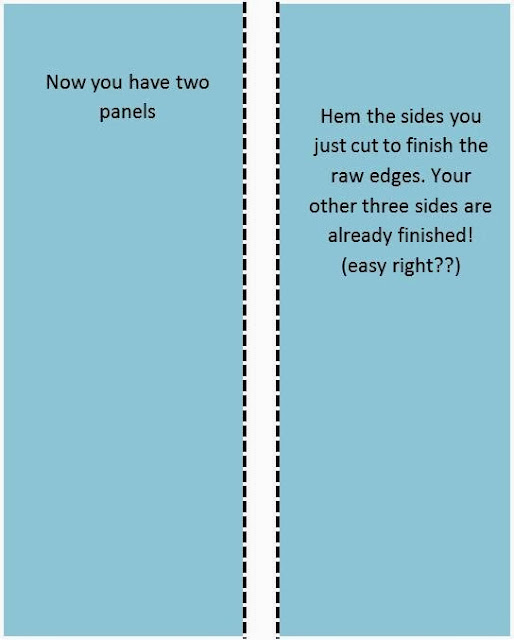
Begin by cutting your flat sheet right down the middle, long ways. (or head to toe)


Finish your two panels with a rolled hem on the side you just cut.
Turn the side under 1/4", then another 1/4" and sew.


You need somewhere for your curtain rod to go. I folded my top over about 6".


Sew two lines of stitching. One at the bottom of your folded fabric, and another about 2" higher. If you are using a large curtain rod, you will need to have a larger casing. Measure accordingly.


Once you're done, your beautiful curtains are finished! Throw a curtain rod in there and put them up. And since they are made of bed sheets, they are very washable!!
(Great for my house with my black kitty cat)


They look even better knowing they didn't break the bank!

*Happy Sewing*

As seen on CraftGossip.com

Thursday, January 2, 2014

Bedroom Redo

It has been a loooong time since Hubby and I had a new "style". I painted our bedroom after we got married, in our wedding colors, and now we're tired of it. Don't get me wrong, sage green and brown are beautiful colors, and beautiful together, but after 5 1/2 years it started looking a little country.

I don't have "before" pictures of the room, because I was too excited to get started painting to think about it.

The new room is soothing, spa-like, and most importantly... more modern.


Ahhhhhh. Perfect.


We kept things simple with a few personal touches to make it "ours".

I took the back out of an old picture frame, and added a vinyl monogram to the glass. It really makes a statement in the room without being overpowering.


I hate lots of pillows on the bed. It's just more to pick up every morning and remove every night. I did make this little gem though. Of course...another monogram. Lucky for me, Hubby likes personalized things!


Just three pillows stand between me and my comfy sheets!


I wanted white curtains this time. Hubby thought I was nuts because we have a black cat, but so far they have stayed white with no extra effort from the vacuum.
Even better....they're made from inexpensive bed sheets!


We put out a few of our favorite frames with pictures and sentimental gifts.
Remember the Walk With Me Daddy tutorial?


When I walk into this room now it's peaceful. No more green, brown, dark curtains, blah blah blah.

Just a happy place.


In case you're interested, the bedding is Peyton by Pottery Barn Teen and the wall color (LOVE the gray!) is "Mountaintop"  by Olympic.

Wednesday, July 31, 2013

The BIG Girl Room


Although I am in total denial that my tiny, tiny little girl will  be THREE next week, Hubby and I still decided it was time for her to have her very own BIG GIRL ROOM!
 
She has been in a toddler bed, and does great staying in her own bed at night. Although she would fit in that bed for a long time still, we wanted her to have a room to make her feel super special.
 
You may have seen this little preview before Here.


I've finally gotten all of the pictures off of my camera to share how we put her room together.
 
In an effort to ward off my daughter ever liking the color pink, we painted her nursery navy blue, and accented it with lime green and white. It was girly, without a touch of pink.
 
Three years later, I've lost the war and her favorite color of everything is PINK. Yuck. So to compromise, we left the walls navy blue, and added lots of pink accents to make the room modern and fun for a three year old.
 
 
We bought the pink and white polka dot duvet cover from Pottery Barn Teen. The teen store had much brighter colors than the kids store, which was more suitable for baby girl.
 
I wanted to sew the accent pillows in all different patterns. I used fabrics from the "In the Navy" line by Jacqueline Savage McFee from Hawthorne Threads. There are some beautiful selections of pinks and navy in that line!
 

One of my favorite pillows is the Pebble Quilted pillow. I took a scrap piece of pink fabric, pebble quilted it, and made it into a pillow. The texture is fabulous and looks really cool on the bed!


My second favorite pillow has to be the chevron pom-pom pillow! The pom-poms add a really girly touch, and who doesn't love chevron??
(Okay, a lot of people are tired of chevron, but I'm not yet!)


The bedding is approved by Gray's friend Duffy.

 
The super-pink quilt I made her for Christmas fits perfectly on the end of the bed. As if the bed needed more pink.
 

My Grandma gave me a small sewing table a couple of years ago. I sewed all of my early projects on this table. The chair it came with had a cushion covered in red gingham. It was cute, but not at all for this room. We've moved the table into her room to be a play table, so the cushion had to be recovered! I love how it turned out.


The nursery had a memory board, but it was green. Some new fabric, and sparkly silver ribbons made it perfect for the big girl room. Sadly I had to update pictures too.
 

The door needed to say "GIRL'S ROOM", so I dug through my craft supplies and found some tulle, ribbon and a foam wreath. About 30 minutes later, the Tutu wreath was hanging on the door.
Hubby says it's weird, but I like it, and Gray does too.

 
On the nightstand we put a vase of flowers from her first birthday photo shoot. There is also a palmetto rose from our trip to Charleston last year. I made her monogram on my Silhouette with scrapbook paper, and made a printable for a small frame.

 
The room is very bright with natural light thanks to light pink curtains.

 
Of course, every proper southern girl needs a bow holder. This is one of several!

 
I managed to make it through the room redo without a total meltdown, but I'm still freaking out that 3 years has already gone by. She loves her new room, and so do we.

 
It's perfect for a pink-loving little (BIG) girl.
 

Friday, August 17, 2012

Renovation....done

The renovation on the house is finally finished!! It didn't take too long to actually complete the construction, but organizing is proving to be another story. We're trying to move things from room to room while keeping this new room neat and clutter-free.

We closed in an existing screened-in porch behind our house. This was nice because the roof and foundation was already there. Here are the walls with the new windows cut out. I was so excited about all of the windows.


While Hubby did most of the planning, I had a hard time envisioning how this room would actually look.


Once the dry wall was up and  the windows were in, the vision started to make sense. We put my new couch out there for inspiration.


The outside matched perfectly with the rest of the house.


Soooo many windows!


The view from our bedroom. I love having our own little sanctuary...with a DOOR...coming out of our bedroom. The actually door is a sliding glass door, but I have our curtains partially closed, so it looks tiny here.


The wall color is soothing, the couch is comfortable. There's a TV mounted on the wall, and our computer is there too. A perfect grown-up space.


And best of all....my sewing corner!! No more sewing in a dark corner with no window and one tiny light. Oh the light in this room is just remarkable. There's overhead lighting, and task lighting...all compliments of my adorable Hubby. He wanted to  make sure we could SEE.

I just can't get over how much space I have to work with now.


Now if we could just get my craft stuff into the room we'd be going somewhere.
In time. In time.


Related Posts Plugin for WordPress, Blogger...